How to Install a Fiberglass Wall Liner

How to Install a Fiberglass Wall Liner

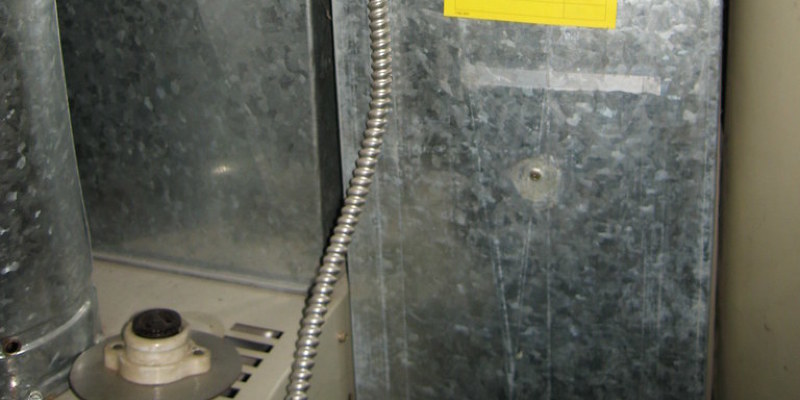
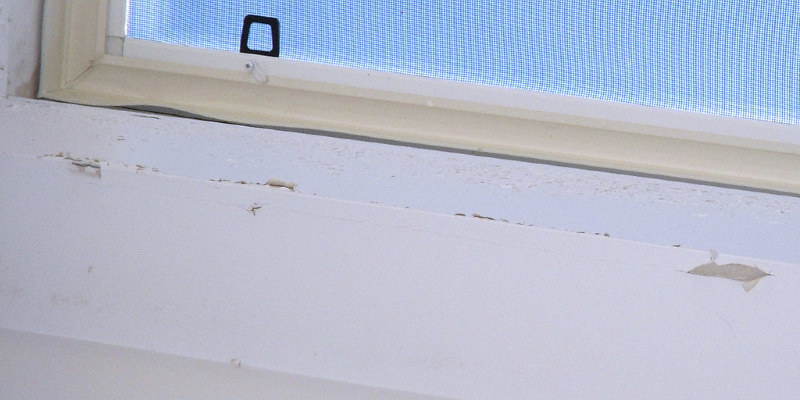
Fiberglass wall liners are used with a tub or shower pan. The wall liners are watertight, and they work as the surround at the tub or shower when installed correctly. Liners are designed to work with their brand of tub or shower, but many permit you to modify the liner to fit your existing tub or shower. It is essential that you use cement planks in your walls as a substrate to prevent mold growth. Your cement planks ought to be level and straight for the best installation results that are liner.

Gauge the width of your wall. Place the wall liner onto a floor. Assess the diameter of the liner. The liner should be the exact same length or more than you want. It is unlikely your wall corners are straight. Place the liner on the wall as as possible with the liner level and also with the surface of the bathtub or skillet if they’re crooked. Place a compass together with the metal tip against the wall and the pencil onto the liner. Find the widest gap and open the compass to that width. Proceed the end of the compass along the wall with all the compass hauled away from the wall in a 90-degree angle. Scribe the wall edge onto the liner.

Cut with a rotary tool across the line that is scribed. Fit back the liner on the wall and to the corner. Mark the height of the liner onto the wall. Lay the liner back on the floor. Measure from the surface of the bathtub or shower pan to your mark. Transfer your measurement. Assess the width in your mark height and transfer your measurement. Assess the width and transfer that mark.

Check to find out how crooked your second corner is. When it’s every bit as jagged, notice the total amount of the location that is very crooked. Quantify that amount. Insert that measurement to the width of your liner on top and bottom marks. Use a straightedge to draw a line and cut on the fiberglass. Position the liner at the corner and scribe the correct fit. Cut your liner again. It should fit comfy and level. It become tight or ought not bind on the wall.

Apply construction adhesive on the wall. Use an adhesive. Position your liner and press it in the adhesive. Pull away the liner after a few seconds. Wait a moment and then press on the liner back . This will activate the adhesive and make it stick immediately.

Draw a vertical line in the facing edge of your bathtub or shower pan up the wall to the height of the liner. Repeat on each side. Measure to a line from the corner. In case your corner is crooked, utilize your scribing method to add the amount of the crookedness. Cut, recut and scribe. Your edge should stay level and vertical. Glue, lift and press on the panel.

Cut your faucet wall liner to dimension using the techniques. Quantify for the holes for the faucet head and taps and transfer those measurements to the liner. Check your measurements. Cut through the liner in your measurement saws. Glue, lift and press on the panel.

Fit the corner to the rear and side wall. Mark the edges of the corner onto the fiberglass in pencil. Apply glue within the marks to the fiberglass. Remove the paper backing on the adhesive strips built into the corner pieces. Press, press on and lift the corner. Repeat with the second corner. Allow the paste.

See related

The Benefits of an Apartment Locator

The Benefits of an Apartment Locator

An apartment locator can perform a lot of the job for a person who’s seeking to rent an apartment. An apartment locator is a professional broker service that looks for prospective dwellings for customers. Agents are professionals who act as an intermediates between the seller and a buyer at a trade.

Tenant Time Benefits

Apartment locators do the initial legwork involved with leasing. Locators save you time, as you are not going to need to look at apartments that do not meet your standards. The locator will look for a suitable apartment for you according to criteria you supply. The list you will receive from the locator should just comprise apartments available in the area you are searching to rent in and within your stated price range.

Particular Conditions Search

An apartment locator has access to special databases and other programs used to acquire highly detailed information concerning rentals. The locator will phone landlords and flat management staff to describe polices for special requirements and conditions. The methods enable a locator to find an apartment that suits your more specific requirements, like a complicated that allows big dogs for a pet owner or a landlord who will rent to a person with a felony history.

Client prices and Rebates

Apartment locators ordinarily do not charge a commission for the service in important cities. The locators earn commission from each rental that is signed by a tenant, referrals or site advertisement clicks. Some locators provide cash rebates to customers who sign a lease to be able to lure you to rent an apartment. Any fees charged to you by the locator should be given to you in writing before you agree to utilize the service.

See related

How Do I Calculate an Amortization Schedule?

How Do I Calculate an Amortization Schedule?

A loan amortization schedule is a list of the loan payments together with the allocation to principal and interest of each payment. Advanced financial functions are required by calculating an amortization schedule. You can certainly do it using an internet amortization calculator (see link below Resources) or using a spreadsheet template which provides the required functions to an Excel or OpenOffice Calc spreadsheet.

Locate a loan amortization template for use with spreadsheet program. A template will establish a spreadsheet with the right purpose, input and output cells for amortization calculation. Links to 2 amortization templates are given in the Resources section.

Download the spreadsheet template that is pick. If you are using OpenOffice Calc as your spreadsheet software you must pick the .ots file from the Vertex42 download webpage. A spreadsheet containing the amortization calculator will start after the template downloads.

Type your loan data to the appropriate boxes of the calculator. You’ll need to deliver the first loan principal amount, date of the initial payment, rate of interest and term of their loan. As you input the data, the loan amortization schedule will be automatically calculated and updated.

Save the spreadsheet once you have the loan data entered. You’ll have a spreadsheet file of the amortization schedule.

See related

Here Is How to Steer Clear of 10 Top Layout Don'ts

Here Is How to Steer Clear of 10 Top Layout Don'ts

Every home design project is beset with its own design difficulties, some of which require a trained professional to help solve. But there are things that I see homeowners do again and again that land them in a situation where their furnishings and interior scheme aren’t working, and they are not certain why. The reality is, if they only avoided a few common mistakes, their space will immediately feel fresh and professionally styled.

Listed below are the top design don’ts and some successful designs that show what to do.

Kate Jackson Design

1. Don’t push the furniture from the wall. You will have a more intriguing space if you allow breathing room around your pieces of furniture, as we see. Allow the furniture to float in the room, away from the walls. This will help create a conversation grouping.

The optimal distance for conversational seating is 4 to 8 feet. This is the Goldilocks zone.

Blackband Design

2. Don’t buy little, cheap throw pillows with strong types. Pillows ought to be ample, overstuffed and formable, such as these. Use soft, plush, down-filled pillows that can take a contour. There are great artificial fill options, also. Utilize the classic “designer’s chop” to determine if they will form up: a quick karate chop to the top edge to break up the pillow’s blockiness.

Get rid of any dead pillows that sit like a lump. Say goodbye to postage-stamp-size pillows and matchy-matchy ones that came together with the furniture. Rather, overstuff an 18-inch pillow cover with a 20-inch insert for a professional look.

Martha O’Hara Interiors

3. Don’t use a good-enough paint color. Paint color breaks or makes the look of a room. If it’s badly matched, the result will be weak at best. It requires experience and a trained eye to properly read undertones. Consult a pro on this one to place your outcomes ahead of the crowd.

17 Things Color Consultants Want You to Know

Tobi Fairley Interior Design

4. Don’t sacrifice light to trim your budget. The error I see most often is light fixtures that are too small or that do not dress the room properly. Use suitably scaled, relevant lighting. Lighting, more than every other element, asserts design, similar to a chosen piece of jewelry defines the design of a little black dress. Don’t be afraid to inject personality with a statement piece.

Blackband Design

5. Don’t skimp on area rug size. An area rug defines a grouping of furniture. Buy one large enough to lie under at least the front legs of each piece of furniture on your grouping.

11 Area Rug Rules and How to Break Them

Tobi Fairley Interior Design

6. Don’t isolate rooms. Create stream from 1 room to another by visually connecting adjoining spaces. Repeat a pattern or carry an accent color or another visual element (for instance, a leg detaiI) from 1 area to another.

Tobi Fairley Interior Design

7. Don’t skimp on drapery. More is more in this section. Pros utilize fabric yardage that is two and a half to three times the diameter of the window to get fully functional drapes. With fixed side panels (for show only), you can get away with cloth twice as wide as the window. Don’t skimp.

Custom Draperies 101

Cecile Lozano Interiors

8. Avoid being overly matchy. Don’t match textiles and furniture — relate them. A designer’s task is to create a collected look. Look for a collection of pieces with some thing in common, like style, motif, color, background, material or mood.

Blackband Design

9. Don’t forget the details that produce a piece specific. I occasionally find the hardest things for my clients to understand is that the details make the design. Nailheads, custom pillows, millwork trim and inlaid floors create a customized look that is drop-dead stunning from the space here.

Once you train your attention to observe the details, you will notice that a chair with a lovely turned leg carved with a skilled craftsperson is different than a mass-produced machine-made piece. Customized details are obvious in professional work. Contrast piecing or piping onto a pillow, or welting, nailheads or trim on a chair. Details, details, details create the result special.

Tobi Fairley Interior Design

10. Don’t stop until you coating. Designers utilize layering and repetition of elements and motifs to achieve a professional look. Many men and women get the concept of layering when it comes to fashion. In design it is not much different. Pick something you love, such as this particular patterned headboard, then replicate the color or the layout.

The artistry lies in stopping until the look gets too matchy (it always helps to toss in something sudden to accomplish this). Subtlety is key. Drapery, wallpaper, pillows, throws, bedding, accessories — all are great options for layering in a bedroom. You be the judge as to how much is enough.

See related

Got a Design Dilemma? Talk Amongst Yourselves

Got a Design Dilemma? Talk Amongst Yourselves

Judy Marusa’s Rhode Island vacation property was falling down. The structural bearing for the house was falling and if she did not find someone to deal with issue immediately, she’d be in trouble. Stuck on the issue, Marusa began browsing ‘s Discussions page, where she’s a frequent poster of and commenter on design issues. She found a article about a beach house in Rhode Island whose homeowner, consumer alazaro, was looking for hints on how to improve curb appeal. At the exact same thread, a pole by design-builder Joseph Yencho caught Marusa’s eye.

Yencho had remarked that he’d worked and needed a house in Matunuck Beach, near Point Judith Pond, in which Marusa’s collapsing house was situated. She clicked Yencho’s profile and found he was friendly, lively in discussions and had expertise. “The closeness was very lucky,” Marusa says. “He was nearby, so I said, ‘Let me just see whether that contractor is thinking about my circumstance'” She posted a comment immediately to Yencho describing her position and asking him whether he would be interested in having a look.

Since structural carpentry is Yencho’s specialty, the chance was a fantastic fit. “She did her study. Checked me out. Called on a Sunday. I finished breakfast and drove down there,” Yencho says. He discovered that the structural bearing was, really, collapsing. He jacked up the corner and installing new framing, fixing the issue. Marusa subsequently asked if he could examine some other issues. He’s now going down there two to three days per month rebuilding a section of her residence.

When the Discussions page launched in 2010, users posted a couple hundred discussions overnight. Now, ers have created more than 500,000 discussions — and counting.

Here’s how to get the maximum out of it:

The Discussions page is a place where homeowners discuss their remodeling experience, locate professionals to hire, assist other homeowners resolve issues and brainstorm design ideas. It’s also where experts find customers, network, offer advice and hone their problem-solving abilities. And the comments could be generous and ongoing. (“I need desperate help with decorating” has well over 3,000 comments and counting.)

Whether you have a query about a project, wish to connect with other design lovers, or just need some support as you renovate, here’s how to get the maximum out of ‘s Discussions forum.

1. Post a Design Dilemma

This is the main allure of this forum. Got a problem that you can’t resolve alone? Upload a photo and let the community consider in. Users can leave comments, offer suggestions and assist you navigate options for your home remodeling project.

How to get more responses on your article: Maintain your title brief. Pose a clear question. Include at least one photograph (you may post up to four, however, you can always leave more in the comments on your own post.) Post a URL to your issue on your own Twitter and Facebook accounts for more participation.

Strategies for commenting on posts: In case you copy and paste a web link from a photograph into a comment, the photograph will automatically appear on your comment. Likewise, if you copy and paste an Ideabook link, a photograph from this Ideabook will look on your comment. It’s a terrific way to share ideas and advice along with other users.

2. Filter by Topic and Activity

Users can toggle among distinct topics and action by highlighting different keywords on the left side of the page. Highlight Design Dilemmas from the Topics pub and play the Activity options. It is possible to view the most well-known discussions or you could change to see what’s fresh and has not been commented on yet.

Before & After is where you can get inspiration or share pictures of your own projects. Using is where you can discover more about how the website works. Consider it a natural FAQ page.

The Other section is for overall off-topic forum stuff. A Pro-to-Pro forum is visible if you’re set up with an expert account. These accounts are typically for builders, architects, interior designers, landscape designers and more to talk about business plans and how to use this website to their enterprise, and to share resources with one another.

When a query has been posted on any photograph on the website — What is this room’s dimensions? Or What is the paint colour on the wall? For example — the queries look in Photo Questions.

3. Make a Poll

Among the most fun features from the Discussions section is the survey, which any user may produce. Click on the drop-down menu on top, then emphasize “Make This a Poll.” Click on the green “Attach Images” text to incorporate a main image. This will also function as the cover image. Then attach photos to go with your query choices. You can also copy and paste the URL from pictures directly into the caption bar.

Poll tip: Maintain the surveys simple and clear. Case in point: Post a picture of your living space with the question “Which couch style is ideal for my living space?” This will let the community vote which they like best for your space.

4. Find superior Topics

Utilize the search bar to locate discussion topics which interest you. Again, play the Topic and Action areas on the left, then use the search bar to search for discussions regarding “fireplace mantels” or “Rust-Oleum cupboard transformations.”

Search tip: If you’re the owner of a product or company, search here in the discussions to determine what people are saying or should they have queries you can help reply.

5. Locate Top Commenters and Featured Discussions

Look for the top commenters for recent action and to find interesting, active people to follow . Click on the person’s page and you may see each of the discussions he or she’s been active on.

Featured discussions are curated from the community managers based on quality photos and a fascinating story or issue. If your issue becomes featured by , it gets posted on ‘s Facebook page and perhaps will appear in the weekly newsletter, which may generate lots of responses.

Your flip. Have your own dilemma or project to discuss? Start your own conversation here.

More: 9 Power-User Tricks to Get More From

See related

How to Replace Rotten Window Trim

How to Replace Rotten Window Trim

If you want to resell a home, keep in mind that the outside is the first thing people see. By noticing what condition the trim is 31, when people walk into a home for the first time, the majority of them have already done an evaluation of the home. Your home is already off to a bad start if the window trim is currently missing. The order in is important to repel water correctly, although it does not take exceptional skills to replace deteriorated or sterile wood trimming.

Insert the tip of a flat crowbar. If it won’t go under, tap with a hammer the back of it. Pry down on the crowbar up and lift the trim.

Grab the trimming with both hands till it comes free of the arrangement, and pull it. That is fine if it breaks. Use the claw end of the hammer or the crowbar to remove. Eliminate of trim.

Measure of the window across the bottom. Using a miter saw, cut a new piece of span.

Place the trim beneath the window. Flush it on both ends. Use a 2-inch and hammer nails to attach it, spacing the nails no farther than 16 inches apart.

Measure from the top of the window, down both sides that are vertical. Be certain to measure all of the way to the base of the brand new piece of trimming that you nailed on. Cut and nail them flushing into the top and underside.

Measure from the upper corners of the window throughout the top of trim which you nailed on. Cut nail it on and a piece of trim to that dimension.

Run a thick bead of exterior caulking around the outside and inside perimeter of the trimming. If you have cracks anywhere, fill them with caulking. If your joints are not tight or perfect, fill them with caulking. Paint or seal to match existing exterior.

See related

How to Build a Table With a Laminate Countertop

How to Build a Table With a Laminate Countertop

You may build a simple table with panels for a laminated top and thighs using hardwood plywood. This kind of table is sturdy and won’t wobble. The strength comes from three plywood sections which compose the table at an inverted”U” shape. This layout has been around centuries, resembling an old-world altar. When laminate is inserted, it turns into a contemporary table in your property.

Put two of those -by-30-inch pieces of plywood horizontal across two sawhorses. Use a brush to cover one side of them with adhesive. Put the two -by-30-inch pieces of plywood on top of the pieces. Stack all four pieces. Put hand clamps around the outside of the stack, spaced and twist. Wait one hour for the paste to dry and remove the clamps. All these will be the leg panels.

Put among those 3/4-by-24-by-36-inch pieces of plywood over two sawhorses. Brush a layer of adhesive on one side. Put the piece on the piece. Put hand clamps around the perimeter every 6 inches and twist. Wait one hour for the paste to dry and remove the clamps. Here is the top.

Run a bead of adhesive on the backs of all four of those 1/4-by-inch pieces of hardwood. Put one on each of the 1 1/2-inch sides contrary from one another on the rough-sawn border of the plywood panels to pay the saw border, of these panels. Pin nails along both sides of the hardwood strips, spaced to secure the strips.

A table saw blade to 45 degrees. Once you miter them miter the ends of all four pieces. Run a bead of adhesive across the backs of all four pieces. Put the pieces . Put the brief pieces on the ends of the top, bringing the corners together. Pin nails throughout the hardwood, spaced to secure the hardwood.

Fill all of the nail holes, cracks or seams using wood dough and a putty knife. Sand the top and the leg panels smooth with sandpaper. Round borders and all of the corners.

Glue one 3/4-by-3/4-by-22-inch piece of hardwood to both sides at the same end of both leg panels. These will be the cleats that allow you to attach the top and the leg panels together. Pin nails through the cleats spaced to secure them to the panels.

Put the table top upside down. Run a bead of adhesive along one end of their leg panels. Put them vertically on top of the desk, 6 inches from either end. Use 5/32-inch piece and a cordless drill to drill six pilot holes on both sides of the leg panels through all the cleats.

Add 2-inch screws in all the holes. Use the screw gun to tighten the screws into the holes, securing the leg panels to the very top. Twist the table on the feet of it.

Brush a layer of contact cement onto the rear of the laminate, and the table’s cover. Wait 30 minutes. Put the laminate on top of the desk, making sure that the borders overhang on all four sides. Harness the laminate randomly mallet to bond it to the plywood.

Add a 3/8-inch flush cutting piece to a router. Route around the outside of the table top to remove the edges of the laminate. Sand the edge of the laminate and hardwood with 120-grit sandpaper attached to a hand block. Stain and lacquer desired.

See related

The Way to Jackhammer a Floor

The Way to Jackhammer a Floor

Buying a jackhammer for ripping up a flooring at home isn’t cost effective, with prices running $1,000, due to this date of publication. But renting and having a jackhammer is more than simply laying your money down and taking one house. Safety equipment is compulsory. Jackhammers are dangerous if misused, but with care and the ideal technique, it is going to remove a flooring faster than any other hand-held tool.

Dress in clothing and boots.

Plug the compressor to the electric socket for a pneumatic jackhammer permit it to begin to fill with air. Attach the compression hoses into the compressor and into the hammer unit by pulling back to the hose nut with your fingers and forcing it over the nipple. Release. An electric jackhammer does not need a compressor. It works by plugging it .

Mark the area to be removed with a paint or chalk line.

Put on safety goggles, hearing protection and a breathing mask.

Attach the correct piece to the jackhammer by sliding it into the correct hole and tighten it down with the provided screws or chuck. You are probably going to begin with the chisel bit to make the first hole in the concrete.

Position yourself in front of the area to be jackhammered. Keep your feet balanced and roughly 45 degrees apart. Hold the jackhammer up before you with both hands securely on the grips. Don’t allow it to lean to any side.

Put the jackhammer over the center of the floor area with the weight of it resting on the chisel bit. Switch it on. Don’t force the machine downward; instead, allow it to go up and down alone, which does the work with its weight.

Change the piece to the spade bit after the initial hole is punched to the concrete. The spade bit is much bigger in diameter and may break off large pieces at one time.

Put the spade bit blade close to the border of the center hole and turn back the hammer on. Continue to split chunks of concrete off back toward the border of the area to be removed. If the blade is too much back from the center hole, it might bind in the concrete. Stop the hammer and then move the blade should this happen. Trial and error will show you the optimum placement for the blade to reduce the largest possible parts of concrete from the floor.

Discontinue if necessary to remove the cracked concrete from around your cutting area with a shovel and set it into a wheelbarrow to be moved as necessary. A bolt or rebar cutter may be required to free up the concrete if the floor was reinforced.

Permit the jackhammer to come into a complete break after turning it off prior to removing your palms. Always rest the jackhammer in a erect posture.

See related

Typical House Additions

Typical House Additions

If your family is growing or you just need more space, a home improvement may be a cost-effective way to achieve your wants. Home additions can be a lavish or functional alternative, but whatever the case, the expense is an investment which can potentially increase the value of your premises. Improvement yields vary, according to the property’s location and the addition’s function, but based on a survey by Realtor.org, homeowners can expect to recover about 64% of their project’s cost.

Deck

A wood deck is perhaps the cheapest method to add value to your property. According to Remodeling magazine, the average domestic cost to bring a wood deck is approximately $10,000. However, homeowners can expect to recover about 82% of the cost. A combo deck costs marginally more and includes a lower yield yield. The identical survey reported that the national average cost of a composite deck inclusion is over $15,000 and yields a yield of 74 percent.

Bedroom

For growing families, adding a bedroom by refinishing an attic or basement, or by physically adding a new room may be more cost-effective than purchasing and moving into a new home. Not all bedroom additions are made equal, however. Based on Remodeling, a master suite prices normally $100,000 but produces a normal yield of 66 percent on resale value, while the average cost of an attic bedroom is $43,000 and contains a mean yield of 74 percent. One proposed strategy is to search for large enclosed spaces which can be shut off by building a new wall. By way of example, homeowners could invest $400 to get a new wall installation but boost their home value by approximately $40,000.

Garage

According to repainting, the normal cost of a garage addition is $57,000 and yields a mean yield of 67 percent. Garage prices vary based on type and finish. Some garages are constructed with complete electrical outlets and finished walls, while other garages are merely a shell of their space. If the addition involves stretching or building a new roof, then costs related to adding a suitable ventilation system need to be considered. Homeowners also have the option of building a carport, which is a simpler and cheaper solution to get a vehicle shelter.

Toilet

Bathroom additions cost on average $38,000 and generate a mean return of approximately 64 percent, based on Remodeling. Much like any improvement, the cost of building a new bathroom will vary based on size, complete and the complexity of the project, because plumbing is thrown into the equation. In accordance with Remodel or Move, several types of toilets have special size requirements. A powder room (or half-bath) should be at least 18 square feet. A bathroom with a shower should be at least 30 square feet. And a bathroom with a shower and bathtub needs to be at least 35 square feet.

Family Room/Sunroom

A family area may cost more to build but has a greater return on investment. According to Remodeling, a household room prices normally $81,000 to build but produces a yield of about 66 percent. On the flip side, a sunroom prices normally $72,000, but homeowners can expect to recoup about 57 percent on their investment.

See related

HUD Mortgage Assistance Programs

HUD Mortgage Assistance Programs

The U.S. Department of Housing and Urban Development (HUD) offers new opportunities to families and individuals to reach the American dream. This help is focused toward vulnerable groups like low-income households, people with AIDS, people with disabilities and homeless women and men. HUD’s mortgage assistance programs play a leading role in providing housing aid to people who need it .

Home Mortgage Insurance

The Federal Housing Administration (FHA) is a part of HUD. It insures more than six million mortgages in the United States. The FHA insures lenders against loss to encourage them to spend their money in the mortgage market and unwind eligibility criteria, so lower income borrowers are able to apply for a mortgage.

Graduated Payment Mortgage

This system allows low-income borrowers who can’t afford standard mortgage obligations, but expect their earnings to increase in another 5 to ten decades. Under this application, premature payments are low–so low, that they don’t even cover the interest, what is known as negative amortization. The negative amortization is added into the loan balance and paid in after years when the payments increase.

Growing Equity Mortgage Insurance

This system allows homeowners increase their monthly payments gradually to reduce the term of the mortgage. This saves money on interest payments and raises home equity faster.

Approved Counseling Agencies

HUD sponsors approved housing counselor agencies around the nation. Homeowners, renters and those searching for a home or a rental can seek guidance from home counselors at no cost. These professionals have a deep understanding of the mortgage market and can assist homeowners to buy a home, refinance their mortgage and avoid foreclosure.

Good Neighbor Next Door

According to HUD, studies indicate that areas with law enforcement officers, educators, firefighters and other public service professionals are stronger and safer. The Good Neighbor Next Door program encourages such public servants to buy a home in revitalization areas at a 50 percent discount.

See related