12 Retro Pieces to Accent a Contemporary Space

12 Retro Pieces to Accent a Contemporary Space

Love your modern home but itching to add a feeling of yesteryear? The answer could lie in the addition of just the right decorative piece. Not only do retro pieces triumph in introducing that feeling of nostalgia your interior could be craving, but a lot of them also mix well into modern settings. Check out these house interiors for types of bits to consider, and see how they combine in modern spaces without moving’70s cliché.

Elad Gonen

A shag rug. This entire area is succulent with retro dash — mid-century furniture, yellow and purple upholstery, a green wall panel — but that shag rug is the cherry on top. Layer it on herringbone wood floors and accent it with a modern piece of art and you’re mod retro all the way.

Susan Diana Harris Interior Design

A geometric area rug. If the shag isn’t doing this for you, go for some geometry. It is equally retro and likely less maintenance. You can up the ante of your aesthetic allure with mid-century furniture or scale back with modern choices. Either will work with this rug.

Kaylovesvintage

The Eames Chair. You really can’t fail with this seat; it manages to feel chic, modern and timeless all at once, which means you may use them forever. Pick colors like burnt oranges and greens to enhance the retro nostalgia.

Elliott Kaufman

A “Love” poster. Ok, pretty much any art that expresses”love” will probably be associated with the’60s. But the colour and makeup of this specific poster by Alexander Girard is a retro beat above the rest that will still have a house in any modern interior.

Kristen Rivoli Interior Design

The Mobius Table from DWR. Oh, those table legs! The neighborhood will be speaking about how cool this table is. It is mid-century contemporized by means of a glass top. Pair it with a neon lamp and brightly upholstered furniture. Along with the neighbors will proceed from speaking to drooling.

Amy Lau Design

A colorfully colored credenza. Is it modern? Can it be retro? That’s the point; it’s a bit of both. The blue and yellow point to yesterday, the contour can swing both ways, and the stainless steel feet give it the modern edge. Discuss killing two birds with one stone!

David Lauer Photography

A wooden credenza. This one, all wood with skinny legs, is definitely more classic retro. Keep it in the modern world by accessorizing it with modern knickknacks.

Kristen Rivoli Interior Design

A futon. Were not think futons had everywhere outside college campuses? Think again. Not only will they accomplish this retro feel, but they will save space in tiny dens or offices while still providing an excess spot to sleep to the occasional guest. When decorating about it, treat it like a sofa. You’ll discover it will easily transition to your modern space.

Kaylovesvintage

The F511 Lounge Chair from YLiving. This seat makes me want to kick back and listen to the Stones on vinyl. It is certainly an investment bit.

Lola Nova

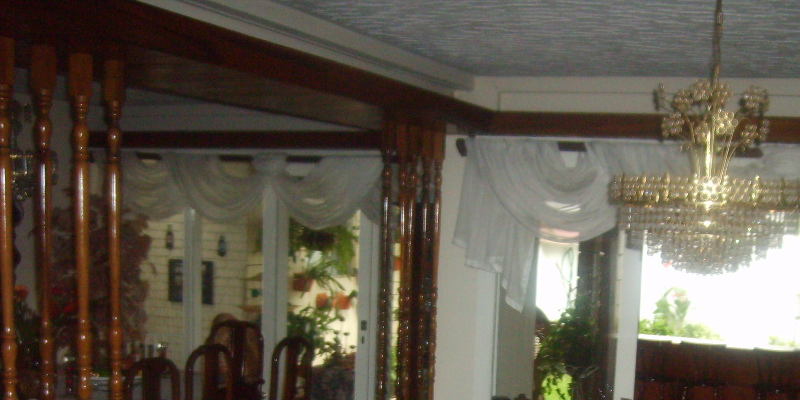
A mid-century office seat . What a great juxtaposition between this burnt-orange chair and the romantic floral drapes with table. This sign of an unexpected Adirondack seat gives the whole setup a splash of pizzazz.

Scheer & Co..

Colorful dishware. Irrespective of how modern your own kitchen is, it can always benefit from a pair of dishware in unexpected colours. Instantly retro, immediately chic.

Funky accessories. Too nervous to go all the way with a large piece? Make some space on a console or side table for some accessories with a retro kick.

Next: More ways to play vintage style
Cool Threads: Shag Rugs Stage a Comeback

See related

Hang a Tapestry

Hang a Tapestry

If you are searching for something particular to hang on your walls, consider a tapestry. Unlike a framed painting, a tapestry has motion since it hangs out of a pole with decorative finials. This ancient form of art could be costly, but nowadays you can discover affordable options for $100 and up.

You can locate some of your favourite art reproduced in tapestry type, whether it’s a work by Thomas Kinkade, Vincent Van Gogh or Leonardo de Vinci. Or you can think outside the box and hang quilts, fabric pieces or rugs as tapestry-like art.

Create one large statement . Take under consideration the size of the wall when buying a tapestry. A massive piece within an open space like this makes a space feel more comfy.

HartmanBaldwin Design/Build

If you are renting and unable to paint the walls, hang a massive tapestry to add colour and drama to your space.

Tracy Murdock Allied ASID

When a tapestry fills a wall it’s truly a dramatic way to create a large impression. Plus they look fabulous against white painted walls, so no need to paint!

Jane Ellison

Create a space that feels traveled and warm by using a tapestry with a few golden colour and Asian flair.

Dillard Pierce Design Associates

Tapestries are ideal for double-story foyers. It’s possible to spend a whole lot of cash on an antique hand woven piece, or find a replicated slice for less.

Letitia Holloway

Tapestries using a Renaissance, Neo-Classical theme add an Old-World allure. Attempt one using rusty reds inside to get a warm feel. It can hang over an accent table or buffet. Add sconces on each side for elegance along with more warmth.

Vanni Archive/Architectural Photography

Tapestries can be modern, like this eclectic and artsy piece. It makes a great focal point in this white space.

Bosworth Hoedemaker

Create your own headboard seem. Hang a tapestry over a bed and add immediate wow!

For Folks design

To coating on the richness and interest at a bedroom shed a tapestry from the wall on either side of a mattress.

You may want to consider a tapestry that hangs if there’s a seat rail below it.

Karen Schaefer Louw

Hang a tapestry horizontal over a buffet to cover more of the wall.

Joel Kelly Design

Tapestries with classic scenes of landscapes could be relaxing and feel comfy at a distance.

Kate Jackson Design

Find a fun tapestry to use in a child’s space similar to this Atlas Tapestry out of Urban Outfitters.

More:
Unusual Art
20 Creative Alternatives to Fine Art
10 Design Strategies for Art Lovers

See related

The best way to Turn the Blower on Without Operating the Furnace

The best way to Turn the Blower on Without Operating the Furnace

Furnaces use blowers to move air that is heated through the duration of home duct work. The blower may also be used also be employed without with no furnace burner’s ignited. To circulate air and obvious dirt from duct-work, keep the blower in the “on” place.

Move hurdles or furniture away in the warm-air supply register as well as the cool-air return.

Locate family members thermostat. Look for the enthusiast and heat switches. The lover change typically has two options: car and on.

Switch the fan setting to “on.” Listen for the sound of the blower.

Check that air will be sucked to the cold-air returns and being blown in the warm-air registers. If air is not circulating, examine the furnace for a filter that is dirty or related obstructions blocking airflow.

See related

How to Do Laundry in the Bathtub

How to Do Laundry in the Bathtub

Moving right into a new home includes several inconveniences, one of which may include waiting for the appliances to arrive in the store. You you have to do do lots of laundry away, and in case your washer and dryer will not be be shipped for another day or two, clean your clothes in the bath tub. You will save money by not going into a laundromat, and any laundry detergent you have on hand can be used by also you. Your arms might get somewhat exhausted agitating the garments, when you are completed, but you will possess a load of laundry.

Plug the tub, and fill it with enough water. The temperature of the water on the directions located on the clothing. Separate and clean your laundry in accordance with the water temperature that is recommended.

Add the proper quantity of detergent to the water-based on the dimensions of the the strain. Refer to the guidelines for the quantity of the detergent required to to clean one load. If performing half of a lots reduce the detergent by half.

Put on the rubber gloves. Swish the water to develop suds up. Place the laundry in the tub, and submerge most of the things in the water. Let the laundry soak for 10 minutes.

Swirl things against each other aggressively, and the laundry in the water. Rub posts of clothes together to eliminate any stains. In case you’ve one scrub dirty areas using a scrub brush. Continue to squeeze, bunch up, and shake the laundry underneath the water for at least five minutes.

Unplug the stopper of the tub. Wring out extra fluid from your laundry as the water disappears down the drain.

Turn on the faucet, and get the water to the temperature right for for the clothes you are washing. Squeeze each post of clothes underneath the running-water to rinse all the soap out. Do this for several seconds with each post of clothing. As you end rinsing them, set the products a side to the end-of the tub.

Plug the drain, and allow the tub is filled by the water before the laundry is submerged. Swirl the clothes in the water and squeeze the soap out. Unplug the stopper, and start the faucet. Until every one of the soap is eliminated, rinse the clothes beneath the operating water asneeded.

After eliminating every one of the soap wring out the clothes individually and location on a rack. Alternatively, it is possible to hang the clothes outside on a clothes-line or drape them over chair or a porch railing. Lay plastic rubbish bags over furniture which you do not want to get wet from the clothes that was moist.

See related

The best way to Wash #3 9 & a Rubber Plant;s Leaves With Water & Lemon Juice

The best way to Wash #3 9 & a Rubber Plant;s Leaves With Water & Lemon Juice

A tree made well-known by easy care and its foliage, the rubber plant frequently serves as an ornamental house plant. Also called the rubber fig, ficus elastica as well as the rubber bush, this member of the Moraceae family is is known as because of its production of latex sap, that was originally employed to make rubber. Today kinds of latex-generating trees offer materials for the rubber market, as well as the rubber plant is rather valued for aesthetic reasons, including its large, shiny leaves. To keep your rubber plant seeking its finest, keep the leaves free of mildew and dirt buildup.

Fill a spray bottle and spritz a clear bit of cloth, including spare cleansing rag or a gentle wash cloth created from old garments. Get the fabric moist but not wet.

Place your hand underneath a leaf in your rubber plant and wipe the topside down toward your body, with all the fabric, to eliminate the dirt. Do therefore on all the leaves.

Open the spray bottle up and add 1 teaspoon of lemon-juice. Close the bottle and shake it until well-mixed.

Spray it with the lemon-juice mixture and choose a fresh cloth, again obtaining the fabric only somewhat moist.

Wipe down all the leaves using the new fabric to eliminate places and mildew residue from hard-water deposits.

See related

The best way to Create a Yard Deck

The best way to Create a Yard Deck

Creating a lawn deck is a a great way to strategy to add value to your own home. As it’s not attached to your own home this kind of deck is occasionally called a floating or free-standing deck. Decks offer extra room cookout together with your family to entertain friends or merely a peaceful place to have a cup of coffee while reading. This can be the best task for do-it- . With preparing and good planning, you be prepared to entertain the next and can construct your deck one weekend.

Planning

Study your yard to find out the best place for the deck. Choose an area which is level and one that doesn’t flood or have standing water.

Indicate the area for the four corners utilizing landscaping spraypaint. Take measurements of the region that is chosen, transfer the measurements into a little bit of paper and make a sketch of the deck. This can help you decide the quantity of materials needed for the task.

Call your city-building department and inquire in the event that you require an allow or whether there are any particular needs. Verify to determine whether there are any constraints or materials specifications for those who have a homeowner’s association.

Set the Footings

Place pre cast cement footings 6″, a-T every corner in in the spots that were sprayed. This permits to get a minor over-hang of the body of the deck. Like, for a10-by-1 2-foot deck, room the footings for the sides 11-feet aside and 9-feet apart for the lengthy aspect. The footings will set the deck 6 inches over the bottom. In the event that you would like the deck nearer to to the floor, seek out out the preferred quantity of grime and sod from under each footing.

Check to find out the footings are in the correct place. Measure the the length involving the footings. The measurement for the extended sides should be equivalent at the same time as the measurement for the sides that are quick. Measure the the length diagonally from your corners that are opposite. These measurements should be equivalent. Make any changes that are essential.

Level the corner footings. Place a-2-by-6inch board in to the grooves of the corner footings and relaxation a carpenter’s le Vel on the board. Make any changes that are required to make sure the footings are level.

Set extra footings between as well as in alignment with all the corner footings on the extended sides. Evenly area the footings 16 to 24-inches besides corner to corner. Level every one of the footings using the corner footings. Set extra footings involving the corner footings on the brief sides in a style that is related.

Set the the inner footings in rows between footings on the extended sides. Double check always footings before continuing for le Vel.

Assemble the Body

Construct the body on the bottom off to along side it of the footings. Because of this example, use two 1 2-foot and two 1-footboards. Sandwich the boards involving the ends of the boards that are lengthier. Make certain the sides of the 1-0-foot-boards are flush using the ends of the 1 2-footboards and then attach them together a T the corners.

Lift the body, using the aid of an assistant, and place it. Adjust it therefore that there’s an equivalent a mount of over-hang in the corners.

Place 1-foot deck joists or help boards in the grooves of the the inner footings involving the 1 2-foot sideboards. Attach each assistance board to the sides of the 1 2-footboards with decking screws.

Install the Leading Boards

Lay the 1 2-foot best board on the other side of the assistance boards. Start a-T one aspect such that it’s flush with all ends and the outdoors of the body and placement the board. Attach it with decking screws to each help board.

If the lumber is moist Butt the board-up against the medial side of the first. As the wood dries, it is going to shrink and a little gap involving the boards will will build up. It’s important to have a a niche to permit water to drain off the deck.

Maintain A1/8- to 1/4inch gap between lumber that is dry. This is done using a nail that was spare. The nail functions just like a spacer. Hold it with decking screws, and after that attach the most notable board to the assistance boards. As you make the right path toward the contrary side of the deck continue the method.

See related

The best way to Get Cleared of an Aged Dehumidifier

The best way to Get Cleared of an Aged Dehumidifier

Get rid of your de-humidifier the accountable way instead of merely putting it on trash day next to your trashcan. Dehumidifiers are a kind of equipment that eliminate excess humidity in the air, hence lowering mildew and mould buildup in the house. Look for methods it could be re-used or recycled in the event the equipment is in excellent operating situation.

Selling

Sell your de-humidifier in flea-market or a garage sale. Do therefore along with other appliances that are outdated or sell them on it’s own. Browse the classified section of your newspaper to find out if an advertisement has been put by anybody about purchasing appliances, about promoting the de-humidifier, or place an advertisement yourself. Another alternative would be to sell the appliance into a pawn shop.

Donating

Donate the de-humidifier into a charitable organization in your area. Look for Goodwill or Salvation Army stores, or check out nearby second hand shops that donate all their profits or most . Do some investigation to seek out an organization that supports causes you’re interested in, like a thrift-store that donates its proceeds to AIDS study, in the event that you reside in a area with several choices of the kind. Ask to get a receipt if wished to to use the donation as a tax writeoff.

Give A-Way

In the event you’re not having much luck marketing or donating your outdated de-humidifier, speak to family and buddies to discover some one interested in taking the the applying. Supply the dehumidifier to one who is suffering from humidity or a friend with mould allergies – connected headaches. Family and friends who’ve issues with pest insects can gain from a de-humidifier, as cock Roaches, ants, termites, centipedes, silverfish along with other bugs are interested in use and humidity dampness-abundant surroundings to create websites that were breeding.

Throw A-Way

In the event you if you choose to to toss your outdated de-humidifier a-way, c-all the public-works division of your nearby municipality to learn how to the best way to responsibly dump the the applying. Just like air conditioners, several de-humidifiers use HCFCs, or refrigerants containing hydrochlorofluorocarbons. HCFCs add to the destruction of the world o-zone layer when launched to the atmosphere as a result of improper equipment disposal. They affect climate-change, and are also greenhouse gases. Prior to the appliance may be securely trashed the refrigerant has to be removed with a professional. Depending on the procedures of your town, t-AKE the de-humidifier to your dump website or transfer station, or you might have to to set up a pickup time for the the applying to get a little fee. Ahead of the dehumidifier could be discarded you could also must have your local sanitation division eliminate the dangerous contents to get a fee.

Bounty Progaram/Re-Cycling

Ask your utility company whether it gives a rebate or bounty plan that can pay your equipment to be disposed of by you, and inquire how their plan operates. Like, a bounty system will typically request the appliance works, plus it could only protect appliances with dimensions that are particular. Recycling your de-humidifier isn’t unlike losing it in you will need to have all harmful chemicals removed ahead of the item could be securely re-cycled, which generally requires the assist of your local sanitation division responsibly. The steel elements of the de-humidifier are eliminated for re-cycling and the remaining appliance broadly speaking is sent to some landfill. Talk to your own local public-works office or hazardous-waste facility for recycling your de-humidifier to find out the most useful course.

See related

Wood Heaters: the Best Way To Get the Heat

Wood Heaters: the Best Way To Get the Heat

Useful wood heaters can be essential components for warming, although wood stoves are usually the attractive centerpieces of family gathering room in the house. Optimizing the performance of your wood heater helps to ensure that you are maintaining your heating expenses without sacrificing comfort through the fall and winter months, as little as possible. Getting the warmth out of your wood stove is a mixture of appropriate burning techniques and using style and contemporary wood stove engineering.

Choose only seasoned wood. Freshly cut or “green” wood includes a large proportion of water-weight, which means bad burning and cooler temperatures in your wood stove. Wood which were left to dry for at least 12 months looses a substantial part of burns and its own water more effectively and at higher temperatures.

Opt with high-energy output for wood. The warmth performance of wood species is measured in btu’s, which decide the quantity of heat per cord. Hardwoods, including oak, green ash, white ash, maple and apple, have a few of the best heat power out-put.

Keep water. Rather than a single huge pile of fire-wood, choose for several stacks that are tiny to ensure circulating air can keep the wood dry. Orient your wood piles to ensure sunlight is received by them. Though tarps will keep your wood wind ravages them, and tarps aren’t successful. An easy wood shed with the angled roof that carries rainwater away out of your wood is the greatest defense against dampness that is environmental.

Evaluate the insulation of your home. Drafts around doorways and windows reveal inadequate insulation. The better-insulated your residence is, the less warmth you will free if you are burning wood. It is possible to take tiny measures in reducing warmth reduction though insulating your house is probably a work to get a professional. Like, in case your windows sense seal them or add free insulation to your own attic to stop losing of heat that is rising. Use “snakes” or rolled towels in the front of drafty doorways.

Check the age of your stove. In properties, stoves will tend to be be out of code with existing EPA specifications for performance and emissions. In case your stove installed and was created prior to 1994, it’s likely perhaps not working as effectively as stoves that are newer. Consider up-grading to your post- combuster which permits your stove to burn off the smoke in the exhaust and change it to warmth power or 1994 design to ensure a-T least 76% effectiveness, especially amodel featuring a converter.

Build the best type of fire on your needs. Packed drywood will burn up swiftly a-T high temperature, best for swiftly heating a room that is little. Pack logs close-together in the trunk of the firebox using the coals close to the front to get a slower, mo-Re steady burn up in case you are hoping to sustain a warm-temperature all through a greater area on the span of many hours.

Keep the damper tightly-closed whenever you’re not using the hearth to stop your your heated air .

Make sure your fire-place is outfitted with glass or steel doorways that near the complete entrance of the fire-box on, as-is needed by California regulation.

Opt to get a heater having a lover attachment that circulates it all through the space and pulls heat in the stove.

See related

The best way to Change a Fuel Grill Tank

The best way to Change a Fuel Grill Tank

Gas grills provide a hassle-free method to appreciate barbeque at house. Home fuel grills operate from a 20-pound propane tank also referred to as bottle or a cylinder. It has to be eliminated and replaced using a complete cylinder if you have consumed the propane in the cylinder. Changing a gas grill cylinder is a procedure that is straightforward.

Grills Since 2002

Turn burner valves off. Remove any panels or addresses that block entry to the fuel cylinder. Close the valve on the fuel cylinder.

Undo the connector that ties the grill’s fuel regulator hose to the propane cylinder. Since 2002 use a connector having a plastic ring that fits around the outside the cylinder valve nozzle gas grills produced. Undo the connector yourself, turning it counter-clockwise. In the event the connector doesn’t change effortlessly, change it it with groove joint pliers. Be cautious not to crack the fitting. Pull the regulator from the fuel cylinder.

Loosen the clamp that secures the very top of the propane cylinder. By undoing a wingnut, in many grills, the clamp loosens. The clamp usually will both swing apart to free the cylinder or lift-up. Lift the cylinder that is empty and pull out it in the grill. Inspect the regulator, cylinder and regulator hose for just about any damage.

Exchange your cylinder to get a complete substitute cylinder using a propane trade at any given store, or consider your cylinder to your propane supplier for refilling.

Install the entire cylinder in the grill, sliding it to the area where the cylinder was situated. Orient the valve nozzle of the total cylinder in the same path as the valve nozzle of the cylinder that is empty. Reattach and tighten the clamp securing the cylinder best. Reconnect the grill’s fuel regulator fully cylinder by fitting the black-plastic ring on the valve nozzle and turning the ring clockwise. Tighten hand-tight. Don’t use resources.

Turn on the cylinder valve. Check the regulator link for leaks by brushing a water and soap solution onto it. If no bubbles appear, the the bond is limited. Whether there are bubbles round the regulator link, flip the fuel cylinder valve off. Undo the regulator link and wipe the threads of the cylinder and connector valve using a rag. Reconnect the regulator turnon the gasoline and search for for leaks. Replace any protect panels. Turn on the burner knobs and light the grill.

Pre-2002 Fuel Grills

Before 2002 may possibly use a regulator connector that screws within the cylinder valve nozzle gas grills created before. Turn the cylinder valve off. Undo this connector having a wrench or a joint pliers. This connector utilizes a thread. By turning it clock-wise loosen the connector.

Remove the cylinder from your grill, refill it or trade it for a total cylinder and re install it.

Thread the regulator connector to the valve nozzle till it feels tight and transform it it counter clockwise with wrench or pliers. Turn on the cylinder valve and search for for leaks using the water remedy.

See related

The best way to Glue a Formica Counter Top

The best way to Glue a Formica Counter Top

Contact cement is used to your top to glue Formica. In the event that you are starting assembling counters in a house, or in the event that you are remodeling an older countertop with Formica that is new, contact cement will be needed by you. This unique glue retains qualities for the whole life of the countertop and stays very tacky. It bonds immediately, and when used correctly, takes the guess-work from gluing Formica called plastic laminate — to plywood or particle board.

Place the Formica face-down across two saw-horses. Use a brush to spread an even coat of contact cement on the rear of the Formica.

Spread an even coat of contact cement on the counter. Wait 20 minutes for the contact cement to dry.

Place 1/2 inch dowels perpendicular over the counter, 12″ apart.

Place the Formica along with the dowels, like you’d installed it on the countertop. Make certain the Formica is flush to the rear of the counter and it is square and that it overhangs the edges of the countertop on all sides.

Out beginning in the middle dowel enabling the Formica to relax on the countertop, pull the dowels. The dowels will not adhere to the glue, but it’ll adhere immediately as the dowels are eliminated, as the glue is touched by the Formica.

Tap the Formica down using a rubber mallet. Randomly faucet using a reasonable amount of stress, throughout the very top of the Formica. This bonds the Formica to the countertop.

Route the edges of the Formica with all the counter utilizing a 3/8-inch flush reducing bit.

See related