Trees for Planters

Trees for Planters

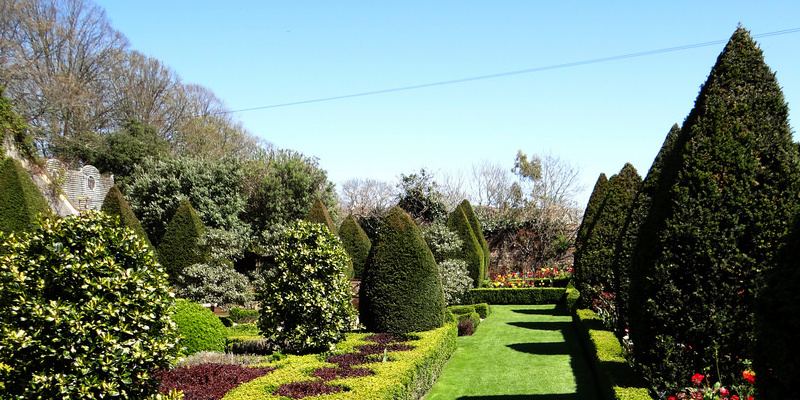
The important thing to planting trees in planters is the use of heavy duty containers with drainage holes. This stabilizes the tree and provides space for the tree’s root ball to increase. Trees act as back-ground plant or a tall component in container crops. When floor area is constrained, as is the situation for condo dwellers, the gardener area is given by planters to plant trees. The gardener controls all the problems that are developing, like water and soil, whenever using planters.

Aromatic Trees

The Peppermint tree (Agonis flexuosa) is indigenous to Australia and grows in Sunset’s Environment Zones 1 5 through 17 and 20 through 24. Exposure to below-freezing temperatures kills the aboveground part of the tree. The willow- tiny white flowers cover the tree in spring, and a aroma is given off by kind leaves when crushed. “Jedda’s Desire” grows 9-feet tall and 6 feet wide with burgundy-coloured leaves. “Na-Na” is a miniature range achieving three to four feet tall with bright-red leaves.

Edible Fig Trees

The edible fig (Ficus carica) is a deciduous fruit tree requiring total sunlight and normal watering in Sunset’s Environment Zones 4 through 9, 11 through 24, H1 and H2. Figs are the eastern section of the Mediterranean region as well as indigenous trees to Asia. They normally develop to 30-feet tall, yet to keep them around 10-feet tall in a container, each year, prune them back. In climates that are foggy, fig trees create just one summer crop. When when creating the options pick types adapted to cool climates. “Desert King” creates green-skinned figs with red flesh, while “Osborn Prolific” creates dark-reddish-brown figs with amber flesh. The “Genoa” fig is adapted to the coastal areas of California with greenish yellow fruit and strawberry coloured insides.

Herb Trees

The culinary herb, bay leaves, arises from in the sweet bay tree (Laurus nobilis). This Mediterranean tree prefers full sunlight to partial shade in Sunset’s Environment Zones 5 through 9, 12 through 2 4, H1 and H2. The leathery leaves are used to flavor stews, sauces and rice dishes. In its native habitat bay reaches 40-feet tall but wants yearly pruning to keep the dimension that is preferred when grown in planters. The cultivar “Saratoga” grows normally in a tree-type without pruning and is ruined by prolonged below-freezing temperatures.

Tropical Trees

Catalpa trees grow best in full sunlight and a few shade in the hottest climate. Large clusters of trumpet-shaped blossoms develop up right, looming on the tropical-searching heart shaped leaves. Place the catalpa tree container within an area guarded from winds that may shred the leaves. Catalpa bignonioides is the name for the catalpa tree that is typical. “Na Na” is A6-foot range that spreads 5 toes wide and never blooms. The canopy types a round-shape that is organic. Catalpa bungei is a pyramid-shaped range with flowers that are purple containing spots. These tropical trees develop in Sunset’s Environment Zones 3 through 1 and 1 4 through 2 4.

See related

The best way to Care for Cherry-Red Peppers

The best way to Care for Cherry-Red Peppers

Cherry red peppers (Capsicum annuum “Cappa Sequence”) come in both warm and mild types. The tiny plants create tiny, scarlet, spherical peppers and grow about 2-feet high. They can be prized for use in arrangements or as an ornamental plant, even though the fruits are edible. Cherry peppers prosper as an annual in most of the Environment Zones of Sunset. Planting them near a south-facing wall encourages fruitfulness and helps reflect warmth.

Mulch on the bed using a 2 inch layer of bark or straw mulch. Use a black plastic mulch to decrease weeds and help keep the soil warm in the event that your home is in an area that is cooler.

Water cherry-red peppers once and and offer one to two inches of water. Before afternoon warmth causes quick evaporation water in the bottom of the plant in the morning can seep to the root zone.

Set a 3-foot tomato cage on the pepper crops to to aid the branches, particularly in places that encounter windy circumstances. Cherry reds have branches that split easily.

A high- phosphorus fertilizer when the peppers start flowering. Sprinkle 1 teaspoon of fertilizer six inches out in the stem. Use a phosphorus-rich vegetable or tomato feed in the bundle-directed price.

Support the fresh fruit in one hand when the peppers are ripe and clip through the stem using a pair of shears. Avoid yanking on the fresh fruit since this damages the brittle stems. When the fruits are firm and scarlet for best taste harvest the peppers.

See related

The best way to Glue a Formica Counter Top

The best way to Glue a Formica Counter Top

Contact cement is used to your top to glue Formica. In the event that you are starting assembling counters in a house, or in the event that you are remodeling an older countertop with Formica that is new, contact cement will be needed by you. This unique glue retains qualities for the whole life of the countertop and stays very tacky. It bonds immediately, and when used correctly, takes the guess-work from gluing Formica called plastic laminate — to plywood or particle board.

Place the Formica face-down across two saw-horses. Use a brush to spread an even coat of contact cement on the rear of the Formica.

Spread an even coat of contact cement on the counter. Wait 20 minutes for the contact cement to dry.

Place 1/2 inch dowels perpendicular over the counter, 12″ apart.

Place the Formica along with the dowels, like you’d installed it on the countertop. Make certain the Formica is flush to the rear of the counter and it is square and that it overhangs the edges of the countertop on all sides.

Out beginning in the middle dowel enabling the Formica to relax on the countertop, pull the dowels. The dowels will not adhere to the glue, but it’ll adhere immediately as the dowels are eliminated, as the glue is touched by the Formica.

Tap the Formica down using a rubber mallet. Randomly faucet using a reasonable amount of stress, throughout the very top of the Formica. This bonds the Formica to the countertop.

Route the edges of the Formica with all the counter utilizing a 3/8-inch flush reducing bit.

See related

How to Prime Exterior Steel Pipe

How to Prime Exterior Steel Pipe

Diligent prep function is required by priming an exterior steel pipe. Peeling paint and flaking rust should be scoured away, and grease and any grime should be cleaned off prior to implementing a rust- . A clear pipe using an exterior that is somewhat scuffed up gives the greatest area to. Exterior steel that is priming properly not only guarantees professional-looking outcomes but additionally protects pipes using a barrier from the elements.

Scrub the the surface metal pipe using a degreaser and steel-wool to remove dirt and oil residue, as well as flaking paint and rust.

The pipe using a power washer to eliminate all traces of the cleanser and residue. Wait for the pipe to dry before you go to another step.

Scrape any remaining pockets of rust off or clumped paint up using a wire brush. Wipe the particles using a tack cloth off.

Sand the the top of pipe with 120-grit sandpaper to scratch the surface for better adhesion in the primer up.

Stick painter’s tape onto places you do not want exposed to the primer. Cover the floor below the pipe using a dropcloth.

Coat the pipe with rust- primer. Support the the can 6 to 8″ away from your pipe if utilizing a spray primer, and use an even coating on the whole area. If using a brush- dip a paint brush to the can, and use a coat of primer over the whole area. Apply one more coat if specified on the label.

Wait for the primer to dry before implementing any exterior paint.

See related

Chinese White Radish Care

Chinese White Radish Care

You will find a number of Chinese radishes today, including Wakayama White, White Shark, the New White Spring and Spring White Jade types. These radishes are an essential element of several dishes in Asia and are also called daikon, lo pue, lor labanos bark or cu – cai with respect to the region. The plant is ideal for all but the coldest parts of California and is very adaptable to various conditions.

Planting Problems

Chinese radishes that are white are. Planting of the radishes needs to be performed about three to six months prior to the first frost of the winter and fall winter months to make sure adequate time for plant development. Check together with the college extension program for location frost predictions. Choose a planting area where natural shade cools the soil. The seeds may sprout in fall or summer temperatures but that could supply the crop a flavor or permit the crops to bolt.

Propogation

Chinese radish is a vegetable that does nicely in combination with parsley, carrots or parsnips. The radish seeds are sown right to the floor. Plant seeds 1/2 inch-deep, one-inch apart in rows spaced one foot apart. Slender shoots to to 2 inches after sprouting. Watering often is essential to preserve soil that is moist. Nitrogen – fertilizer or manure to the soil to enhance leaf construction and the root development.

Harvesting

Chinese radishes that are white mature in a period of three to to 6 months. The plants generate huge roots 2 to 4″ in diameter and may range in size from 6 to 20-inches. Colour and root dimension count on all of the radish. Shapes and colours contain white, oblong, cylindrical, spherical, yellow, green and black. The radishes increase in bunches of one with respect to the kind of radish. Root removing techniques contain grasping the foliage immediately over the very best of the root and pulling or digging round the plant.

Storage and Planning

When the leaves are removed, Chinese radishes may be stored for around two weeks in an ice box or many months months in an awesome, dry location. Till you’re prepared to use it to to increase the storage li Fe, depart the root-system of the radish in tact. Chinese radishes that are white are an extremely flexible vegetable could be prepared a quantity of techniques and to perform with, including boiling, broiling, baking, pickling or grilling. They are able to also be consumed uncooked with cool salads. Some individuals choose to peel the radishes before ingesting them and do not care for the flavor of the epidermis.

See related

The best way to Refurbish a Wood Dresser

The best way to Refurbish a Wood Dresser

Refurbishing an old dresser lets you take something old and make it as good as new or complete it for your taste. Finding aged dressers is as simple as picking up one or for several dollars in a garage sale, you may also refurbish an aged wood dresser that’s been for years in your family. Refurbishing a wood dresser is a task a do-it-yourself beginner can accept, but be warned can take much time of of energy over several times.

Remove the drawers in the dresser. Using the screw-driver, remove the knobs or drawer pulls.

Remove any paint or varnish in the wood dresser and drawers utilizing 16-grit sandpaper on the strength sander. When they’re made from wood, sand the surfaces of the dresser and drawers along with the drawer pulls or knobs. Wipe the surfaces that are sanded using the old shirt. Repeat the procedure that is sanding using the 240-grit sandpaper to eliminate blemishes that are great . The sanded surfaces using the old shirt. Wear safety glasses or goggles to protect your eyes.

A coat of varnish or paint to any or all exterior surfaces of the dresser and drawers. In the event the drawer pulls or knobs are made from wood, paint or varnish them. Use a brush for applying a brush or paint if applying varnish. Allow the paint or varnish to dry according to manufacturer’s directions. Sand any regions of varnish or paint and wipe-off the area using a clear shirt.

Apply another coat of varnish or paint and permit it to dry according to manufacturer’s instructions. Sand any regions of varnish or paint. Keep repeating the sanding before the wood dresser is, and painting or varnishing and acceptably coated. This could take maybe more or three layers of varnish or paint.

A coating of polyurethane end. Use a sponge brush that is new to apply the polyurethane. Allow it to dry according to manufacturer’s instructions. Repeat this process two mo-Re instances. The polyurethane safeguards and seals the wood.

Reattach the drawer pulls utilizing the screw-driver and 1/2inch screws.

See related

The best way to Install a Basement Carpet Without Padding

The best way to Install a Basement Carpet Without Padding

Basements typically have floors that are concrete, and concrete is an ideal substrate for adhesive- carpeting. It’s possible for you to bond utility grade roll carpeting in a basement with carpet mastic that is spread able, but peel-and-stick carpet tiles are flexible, and they can be installed by helpful folks with resources and minimum home improvement skills. Another advantage of carpet tiles is that if one tile is broken, it is possible to pull up it and change it using a tile. Choose carpet tiles in more or two colors to get a patterned or checker-board impact, or use all one colour to get a seamless look.

Clean the Concrete

Sweep the floor using a broom vacuum the ground using a utility vacuum to eliminate the tiny particles that stay.

Mix no-residue ground cleaner with water in a bucket, in accordance with the cleaner manufacturer’s dilution guidelines.

Scrub the floor using a nylon scrub brush as well as the cleaner.

Rinse the floor using basic water and a rag or sponge mop.

Let the floor dry completely, using fans if preferred, to pace the water evaporation method.

Install the Carpeting

Measure divide that measurement in two to get the middle stage on the wall and the fringe of of the ground. Mark the middle stage on the ground with a pencil or chalk. Repeat along both of the perpendicular walls.

Place an L-shaped framing square together with the plane of the wall on the ground with one leg of the flush. Align the purpose of the 90-degree-angle corner of the square using the pencil mark that is centered. One leg of the square should stay butted against the wall, as well as another leg of the square should extend straight-out across the ground in the pencil mark.

Trace the leg of the square that extends out from your wall using a pencil, creating a pencil line on the ground. Make another pencil line in the pencil mark, straight-out on the ground.

Pull a chalk line on the other side of the flooring from either of the pencil lines to the contrary wall. Align the chalkline pull the chalkline taut and snap the line from a floor. Repeat to make still another line that is straight on the other side of the floor in the pencil line that is other, creating a huge cross-formed chalkline that intersects in the guts of the area.

Where the two chalk lines intersect a stack of carpet tiles to the middle of the space.

Peel plastic or the paper backing one carpet tile off.

Align one corner and the edges of the tile with all the edges and one corner of the chalk lines that are intersecting. The lines type a lower-case or cross t, as well as the tile matches round the t in to some of the four spaces.

Peel the backing and place it in to still another spot round the t, butting the edges of the tile that you put.

Tiles against the ground, working-out in the center tiles in all directions. Stop when a tile that is total will unfit to the the area remaining from the tile.

Measure the the area between the tile in AROW to the wall. Measure and mark a carpet tile to that particular distance and slice the the tile having a utility knife. Peel the tile backing off and press the tile contrary to a floor. Finish the perimeter of the area by measuring the areas that are empty and slicing tiles to to match.

See related