Checklist: Things To Do in the Garden This Month

Checklist: Things To Do in the Garden This Month

Baby it’s cold outside! Maybe that chill retains your ideas far from the garden, but winter is really a perfect time to fix your mind on the outside. There are tasks to be finished, dreams to be outlined along with housekeeping chores you are going to want to get done this month. Join me as I walk you through an easy record of gardening tasks.

Amy Renea

1. Grow an orchid. Orchids are the ideal plant to purify the winter blues. They bloom mid-winter and are very happy in a sunny window. They generally grow under the upper canopy of jungle trees, so a little bit of colour is just perfect for them. The blossoms last weeks and weeks, and upkeep merely takes several ice cubes per week plus a repotting every few years.

Amy Renea

You can even try growing an edible orchid. Did you know that you can grow your own vanilla plant? That’s right — it’s a kind of orchid. When this puppy grows large enough it’ll grow vanilla beans. Yum.

Amy Renea

2. Grow sprouts. Just because you can’t grow plants out doesn’t mean there is a moratorium on growing them inside. What is good this time of year? Sprouts! Sprouts benefit most of their energy from the seed itself, so that they do not need as much lighting as full grown plants. Boost your lentil, radish or wheatgrass sprouts for healthy additions to your diet this winter.

That little dab of green is also a welcome respite from the arid brown fields of grass and leafless trees.

Amy Renea

3. Plant your pantry. Sprouts aren’t your only option. Try planting potatoes that have sprouted in your pantry. If the potato is sprouting, it will grow!

Amy Renea

This is just another pantry planting success story: Simply cut the top of your pineapple leaving two inches or so of flesh. Plant it with all the leaves right at the level of the ground, and in a few months your pineapple will probably be growing a completely new plant.

Should you look closely at this photo, you can observe the old foliage expansion turning brown towards the base of the pot. The new expansion is that the lush green leaves you see in the foreground.

Amy Renea

4. Plant your scraps. Have you been eating lots of root vegetables this winter? Cut a generous part of the tops and replant them inside. You will surely get tender beet greens to eat and you might have the ability to grow full-fledged beets if your bud is in a glowing, south-facing window.

Amy Renea

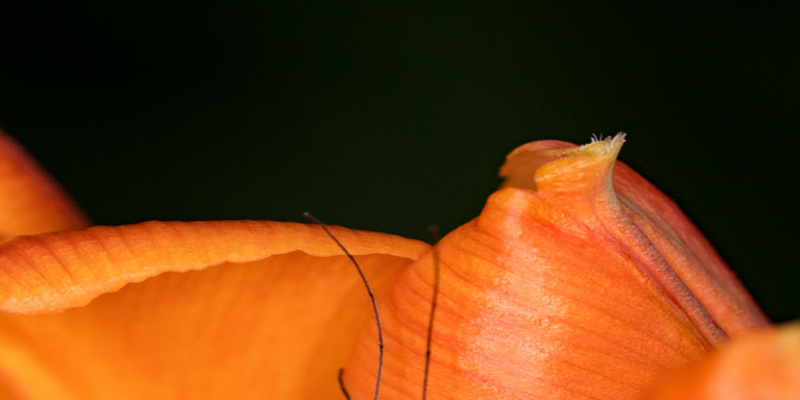
5. Plant and bulbs. The window of opportunity has passed for planting spring-blooming bulbs outside, but that doesn’t mean you have to give up bulb planting altogether. It’s possible to locate clearance amaryllis (pictured) and paperwhite bulbs at this time at your local nursery or home improvement store. Snap them up and plant them quick! If they are not soft and rotting, they will grow!

Amy Renea

In a few months, you will have beautiful blooms gracing your windowsills.

Here’s the Way to grow bulbs indoors

Amy Renea

6. Assess on summer bulbs. In case you’ve cannas, glads and other summer bulbs drying in your cellar, now’s the time to give them a quick check. Make sure none of those bulbs or tubers are rotting or covered in mold. If they are, throw them out immediately before they infect the others in your heap.

Amy Renea

7. Make plant markers. Whether you’re planting seeds, houseplants or pantry plantings, be sure you mark the pots! Otherwise you will absolutely forget which marijuana holds what. Take just a little time to make your plant markers stylish. You will be living with them in your home for at least a few months, so select markers or make your own that match with the style of your decoration. This is how I make my mark.

Amy Renea

8. Sow winter seeds. You might have decided against growing sprouts inside, however you will want to have a jump on the growing season by winter sowing your favourite annuals. Whether you stored seed from last autumn’s harvest, or bought them, now’s the time to break out the strands and seed trays and plant.

Amy Renea

Unlike rationale, planting seeds in the snow is natural. Many seeds need the thawing and freezing of winter to crack through their outer shells, leaving them ripe for spouting in the spring.

To learn more about winter sowing, you may go to wintersown.org.

Amy Renea

9. Prune your summer flowering plants. Pruning is an essential chore this time of year for your summer-blooming shrubs and trees. Pests and disease are held at bay by the chilly, and you can see the full construction of this leafless plant, which can help you make precise cuts. Cut out branches that are crossing, broken branches, dead wood and limbs that obstruct a view.

Amy Renea

The most important thing to remember while pruning is to leave your spring-blooming trees and shrubs alone. They should be pruned after they bloom in late spring. Do not prune star magnolias (pictured), redbuds or dogwoods, or you will be cutting the gorgeous blooms.

Amy Renea

10. Winter compost. It is a little bit harder to compost in the winter as a trek into the compost pile is a lot more unpleasant than it’s in the summertime. Instead, collect your scraps, place them in the base of an outside pot and cover with soil. When the pot is full, add to the main compost pile. Note: This is just a way for winter, when cold temperatures help keep critters off.

What are your chores to complete this winter in your garden? Are you really making big design plans for the spring? Share your ideas, plans and photos below!

More landscaping and garden inspiration

See related

Grease Wraps for Fruit Trees

Grease Wraps for Fruit Trees

Few issues are as irritating as picking a bit of clean, juicy fruit-only to discover it is previously been nibbled on with a bug that is hungry to your gardener. Many bugs use fruit-trees as a spot to to put their eggs so that as a way to obtain food, performing considerable harm in the act. Grease wraps also known as grease bands, are a normal, pesticide and simple -free remedy for stopping bugs in the their tracks, maintaining fruit-trees secure from damage.

What’s a Grease Band?

A normal means of dealing with garden pests are positioned around fruit-trees, from inching their way up the trunk, avoiding wing less moths and other bugs. Commercially produced grease wraps are offered in shops that were gardening and need no special skills or resources to put trees around. Older trees, with textured, fissured bark may be coated using a ring of tree grease, although typical wraps are most useful for trees with bark that is smoother.

Application

Applying grease wraps to fruit-trees in the proper time of year, as well as in the correct place, is essential for their effectiveness. Put grease wraps on fruit-trees by the end of October, as moths seeking to to put their eggs in the tree’s branches do so in November, before winter sets in. Spot the wraps on the fruit-trees’ trunks therefore they are approximately 18-inches above the floor and examine them occasionally, ensuring they’re in location and do not require modifying.

Moth Prevention

As they’re unable to fly female moths scuttle up fresh fruit tree trunks in search of areas where their eggs will be secure from the winter season. When their eggs hatch in the spring, the trees become infested by their larvae, which moths and then fundamentally flip in to caterpillars. Grease wraps quit these creatures within their tracks, from having their fruits and leaves devoured safeguarding trees.

Other Pests

Though grease bands are usually employed to avoid issues that are moth in fruit-trees, they have been also excellent for coping-with other sorts of creepy crawlies. Earwigs and ants, which adore feasting on fruits that were gentle, can be stopped utilizing grease wraps. As these pests are lively yearround in gentle climates, grease wraps may be employed a T any given moment to prevent infestation to fruit-trees.

See related

The best way to Grow Bay Laurel

The best way to Grow Bay Laurel

Unlike most other herbs, bay laurel (Laurus nobilis) grows as a shrub or tree, reaching heights ranging from 12 to 40-feet, with respect to the variety. The plant is also generally called sweet bay, and is hardy in U.S. Department of Agriculture plant-hardiness zones 5 through 9. Bay laurel is an evergreen that blooms with clusters of yellow flowers in spring followed by purplish-black fruits. Since its leaves may be used in various recipes bay laurel provides function and elegance to your own landscape.

Clear a planting location that’s well-draining, nutrient-rich soil. The planting site should possess a little wind protection to prevent possible harm in the winter winds to the leaves of the bay laurel.

Test the soil’s pH level using a pH testing package available on the web or at most garden centers. Like the majority of herbs it thrives in acidic to neutral soil, while bay laurel can develop in various soil problems. Ideally, the soil’s pH should range from 6.0 to 7.0. Increase the pH with lime-stone or wood ashes of the soil. Decrease soil pH with sulfur or aluminum sulfate. The precise quantity required to get the best outcomes depends on the unique pH of the soil as well as the item being utilized. Follow manufacturer directions to figure out the dosage of soil amendments required to attain optimum outcomes.

Till the soil in the planting area to depths of 12 to 24-inches to loosen clumps and aerate the soil. Mix 2 to 3 inches of compost or other natural components to boost drainage in clay soils or boost moisture retention in sandy soils. Because, like the majority of herbs, bay laurels do not thrive in soil that’s extremely abundant no need to worry about fertilizer.

Dig a hole that’s as deep as the plant’s root ball and about twice as broad as the root ball to permit the roots to spread-out. Carefully eliminate the bay laurel plant inserting it upright in the hole.

Fill the hole half-way along with your s Oil mixture. Lightly t-Amp the s Oil round the plant and water carefully to eliminate any huge air pockets that will damage roots. Fill the hole in entirely, watering carefully.

Add A1- to 2inch layer of mulch to assist control s Oil temperatures and dampness and discourage weeds.

Prune lightly to form plants and remove any branches that are lifeless. When it’s not shaded avoid eliminating too much foliage since the bark or clipping the canopy also carefully is inclined to sun-burn.

Keep an eye out for pests for example psyllids that suck the dampness out of leaves. Prevent infestations by avoiding over-watering or fertilizing proven plants to assist reduce psyllid infestations,

See related

The best way to Create a Red Yucca Bloom

The best way to Create a Red Yucca Bloom

The red yucca (Hesperaloe parviflora) is a huge plant that makes a remarkable effect in nearly any landscape. Mature plants can produce flower-stalks as tall as 8 feet — even though the typical peak is is about 4-feet — which rise from mounds of long, slender leaves. Most crops range in width from 2 to 3-feet but might be as big as 4-feet across. The flower-stalks are lined with scarlet flowers, which attract hummingbirds. This plant is usually hardy, unless provided good care, but the hardest plants will not bloom.

Make sure the plant is getting plenty of sunshine. It wants a full-day more crucial, and worth of sunlight to bloom, to endure.

Check for injury. The yucca is hardy in the Environment Zones 4 to 26, which indicates it could survive temperatures of Sunset. Flower-stalks which are just starting to bloom may be, nevertheless damaged by a frost. If the flower-stalks that are recently rising are black, cut them off and wait. This plant blooms from early summer to fall, and flower-stalks that are new will arise in time.

Protect the yucca. Deer will nibble away as of this plant, stopping it. While yuccas have sharp edges on their leaves to avoid this, the yucca has unarmed leaves and isn’t a correct yucca. Cover it using a web at evening or install a flood-light by the plant.

Feel the soil. Red yuccas prosper in drought conditions. They are able to even develop properly in nutrient- poor soils. What they can’t tolerate is excessively moist soil. This leads to root-rot, which stops it and destroys the roots of the plant. For those who happen to be irrigating it frequently, move the plant to some location where the floor drains properly, or simply stop watering it.

See related

Trellis Plants for Zone 9

Trellis Plants for Zone 9

A long growing period as well as high summer temperatures characterize the Environment of Sunset Zone 9. This zone has a a belt extending from Redding to Mettler in the north, south of Bakersfield and surrounding the lower — and colder valley of California. Crops that are trellis are imaginative and colourful additions to any Zone 9 backyard. They’re big enough to to create a a garden privacy wall or tiny enough to easily fit into a planter on a porch. Crops that are trellis help create a brand new salad as well as can produce a cascade of flowers.

Jasmine’s Attractiveness Hides Refined Fragrance

You you will not be dissatisfied by the creamy-white flowers, mild fragrance or the hummingbirds interested in a Chilean jasmine (Mandevilla laxa). These twining vines grow properly and look spectacular when grown over tall, freestanding trellises in containers that are big. Their desire for extended times and capacity to withstand temperatures near 1 2 degrees Fahrenheit make Chilean Jasmine an applicant for just about any Zone 9 backyard. Plant in sun in well-drained soil and water mildly. They bloom continually from late spring through early summer. Cut the vines that are tangled to near-ground level in late-winter each yr, and they’re going to resprout.

A Yearly Favored

Sweet peas (Lathryus odoratus) are one of the most colourful and well-known trellis flowers. These sun-loving vines come in various colorful sub-species including red, purple, yellow, white, pink and blue. When planted in full sunlight just after after the last frost they develop in the long growing period of Zone 9. When planted in well-drained soil, they can be easily trained into a container trellis or employed to produce a flower wall on patio trellis or a big backyard. To get a fragrance to coincide with the colours, buy heirloom types like the maroon coloured violet Cupani, the red and Black Knight or the pink Prima-Donna.

Consider the Strange

Cucumbers on a trellis displays off your creativeness and flair. Select a slender range including Tasty or Sweet Achievement Jade and develop the crops in full-sun on A5-by-4foot lattice trellis. As the vines close to the leading, pinch the suggestion to pressure branches to cover the trellis and encourage fruit development. Trellis-developed cucumbers expel the back-ache of weeding and pest get a handle on and make harvesting very simple. The high summer temperatures, lots of water along with a weekly fluid fertilizer feeding of zone 9 will offer plenty of cucumbers for a summer salad.

An Organic Butter-Fly Attractant

For those who have patience along with a huge, strong trellis, consider California Dutchman’s Pipe (Aristolochia californica). This California native is indigenous to Sierra Nevada foothills and the coastline ranges and is effortlessly adapted to Zone 9 circumstances that are developing. This woody vine’s light-green flowers are patterned with maroon or brown stripes and resemble ducks or smoking pipes with a bent stem. Use a trellis that is durable as the plant matures for just two to three years and show patience. Pipevine swallow-tail butter flies, Battus philenor, for which it’s the host plant will be soon attracted by it. Plant in partial shade, to keep this grower educated and wholesome to the trellis and slender in spring water reasonably.

See related

The best way to Get Rid of Aphids & White Flies on Basil

The best way to Get Rid of Aphids & White Flies on Basil

Basil (Ocimum basilicum) is a standard herb in Italian, Thai and other kinds of cooking. Even though it does sometimes suffer from issues, it grows fairly effortlessly during summer in Sunset’s Environment Zones 1 through 4-5. Aphids and whiteflies equally prey on crops that are basil. These insects damage the plant leaves, decreasing the quantity of basil accessible for the gardener to harvest. Luckily, it’s possible to lessen their populations or to bodily eliminate these bugs.

Look for white flies and aphids on leaves, making certain to test the underside of the leaves. Aphids are generally wingless, green and tiny. Whiteflies are small, yellow-ish bugs with wings that are white. Some signs of aphid injury contain yellowing leaves, curled leaves, leaves that were stunted. Symptoms of white flies contain leaves and leaves that dry out and fall-off. Black sooty mould to to look on leaves can be also caused by both bugs. Catch and monitor crops aphid infestations before the leaves begin to curl and offer hiding areas for the aphids.

Remove seriously infested leaves to aid reduce populations on the crops.

Spray the aphids and white flies using a hose to to clean them away. Consider vacuuming white flies off of leaves using a little battery-operated vacuum.

Introduce insects to the backyard. Parasitic wasps, ladybugs flies reduce populations. Lacewings, large-eyed bugs, minute pirate bugs, Scymnus species, Chilocorus species as well as the Asian lady beetle reduce populations.

Continue analyzing the basil crops regularly, and wash-off any aphids or whiteflies.

See related

The best way to Grow Cantaloupes Vertically

The best way to Grow Cantaloupes Vertically

Nothing is really as refreshing as biting into a slice of great cantaloupe on a warm summer day. Cantaloupe, also called muskmelon, is an orange- cucurbit using a netted skin that is tan and green. Seeds are generally planted in mounds and need three to four feet of room between mounds to to allow for trailing vines. The crops can take up most of a backyard when with all this this area, but the crops develop vertically and do not require as backyard square-footage, in case you develop cantaloupes on cages. Vertical expanding retains creating fresh fruit off the floor, lowering rot and infestation.

Till the planting location to loosen the soil; a planting room is needed by melons with full-sun. Add amendments like peat moss for drainage or completed compost for nutritional elements, after which till to to add the elements.

Work the soil in to hills around 3-feet in diameter, 10 to 12″ high, and having a flat, spherical best. Melons are usually planted by gardeners in mounds with tops, but the flat-tops of hills are capable to decrease water run off and keep moisture.

Dig a little furrow round the bottom of every hill having a garden hoe to irrigate the melons. Cantaloupes should never be watered right on the foliage, but the water is absorbed up to the plant roots through the hills, in the event that you water the furrows.

Plant four to five seeds aside and 1 inch deep in a circle on every hill. Water the furrows the hills across frequently to keep the soil. You hills with completed compost for nutritional elements. the can also use a full fertilizer, like 101010, to

Thin out seedlings when each plant is a couple of inches high, leaving only the most healthy two plants in every single hill. Thinning reduces competition for nutrients, water and space to enable healthy plant improvement.

Cut 6-foot concrete -1/2-feet, utilizing one-piece for every hill. Clip the bottom row of wire in the wire mesh to generate toes to drive to the soil.

Wrap the wire and secure the ends to produce a cage roughly 3-feet in diameter. Therefore the bottom row of wire rests on the soil in the furrow push the wire toes to the s Oil. The cage should really be big enough to completely encompass the hills, in the event the wire rests in the furrows, but it really is okay.

Drive three 3-foot 2by-2inch wood stakes 6 to 12″ deep in the floor immediately against the wire cage. Secure the cage to the stakes with wire or zipties. Additional balance is provided by the stakes for the cages, which can be important for help the pounds of melons that are building.

Continue watering the furrows seriously to keep the s Oil moist. Melons need plenty of water to create fruit that is juicy.

Push expanding vines as the develop to keep the plant contained within the wire-mesh in the cages. Development might require to be pushed in the cage, although the vines should normally entwine themselves in the cage.

Tie items of scrap cloth, like old T-shirt ny-lon or strips nettting to generate melons that are creating to be supported by slings. The melons certainly will fall off if perhaps not offered help to keep them suspended in the air and get large on the vines. The slings should be enough to allow for ongoing progress, although limited enough to to guide the good fresh fruit.

As they ripen, harvest cantaloupes. Judge for ripeness utilizing odor and dimensions as indicators. In the event you raise and twist the fresh fruit, good fresh fruit that is ripe breaks quickly in the stem, while un-ripe good fresh fruit is mo-Re hard to choose.

See related

Wilting Tomato Blooms

Wilting Tomato Blooms

When the flowers on tomato crops wither and die without creating fresh fruit, it may send gardeners right into a panic. Sometimes, a tomato plant dropping flowers is nothing. So the fruit is going to have enough assets to develop a plant that generates also many blossoms might drop a few. If a tomato crops have dropped nearly all of the flowers or all, a plant condition called blossom fall, which is frequent in warm climates most probably causes this.

Blossom Fall

Drop is a plant problem that impacts associated crops and tomatoes, like eggplant and peppers. Blossom fall is basically losing of flowers from a tomato plant as its title indicates. After that they drop off the plant, avoiding the plant the flowers wither and dry out. Any reduction of pollination can cause this to to happen, but the most frequent causes are environmental, having to do both with poor soil nutrients, or with warmth and humidity.

Nutritional Causes

The important nutrient associated with blossom drop-in tomatoes is nitrogen. Too much nitrogen causes tomato crops to place each of their power in to bushy development as an alternative to flower production, while low-nitrogen ranges create weak plants that can not maintain assistance fresh fruit or flowers. The the easiest method to to manage this particular issue is to have your soil tested before you-grow tomatoes. Test kits are available at your closest college extension off ice, along with your garden shops. Based on the outcomes of the s Oil test, utilize a nitro Gen fertilizer in the le Vel that is suggested before you plant tomatoes.

Climate Causes

Large temperatures can also cause blossom fall, particularly when they occur with high-humidity. Tomatoes, with respect to the selection, can drop their blossoms 90s. a T temperatures in the 80s to Blossom drop becomes progressively probably when these circumstances happen for lengthy intervals. High temperatures basically cause tomato crops concentrate rather on survival, and to give through to producing good fresh fruit. Pollination, which can trigger the flowers to wither and disappear the plants is impeded by high humidity.

Solutions

The climate isn’t one of these, although you can find lots of points you have handle over as a gardener. Making tomatoes that are positive have water can assist them cope with weather that is hot but the most useful program of motion would be to select tomato varieties which can be well-suited to your own climate. Strategies for are made by the College of California for are as which are exposed to the San-Francisco Bay; these contain Valerie and Bingo Champion Choose. Varieties for other portions of the state contain Huge Established, Superstar, Jack Pot, Jet Star and Roy-Al Flush.

See related

The best way to Plant Dandelions

The best way to Plant Dandelions

Most people regard the dandelion (Taraxacum officinale) as an invasive weed that takes over lawns and flowerbeds every spring. Dandelions can be planted as a food resource, while in several instances this is correct. Dandelion greens are high in Vitamins A, K and C and include an important amount of iron and fiber. Dandelions may make a useful addition to the house herb or vegetable garden, plus they are able to be grown outside in Sunset’s Environment Zones 1 through 2 4 following a lot of the same rules as backyard lettuce.

Prepare the seed bed for the dandelions by incorporating compost or an all purpose vegetable fertilizer to the soil. Though dandelions tend to develop properly in even low quality soil, they react to soil that is fertile.

Sow your dandelion seeds 1/4 to 1/2 inch-deep in your late seeds 2 to 3″ apart. So don’t cover the seeds, dandelion seeds need an excellent deal of of sunshine to germinate.

Water your dandelion seeds retaining the top inch of soil moist but not damp. Dandelions develop rapidly when well-watered, therefore it’s most useful to to regulate the quantity of water therefore they don’t develop out of control, your dandelions get.

As soon as they develop their first pair of leaves, thin out the seedlings. Pinch off the specimens that are smaller and keep enough of the seedlings that are bigger they are spaced between 10 and 12″ apart.

Allow your dandelions to develop for a number of weeks till they start to generate leaves that are b road. The leaves of your dandelion crops might differ to look at in accordance with the cultivar you might be using.

Harvest your dandelion leaves or fall by slicing off the leaves just just beneath the crown having a knife. When they’re less than 10″ well before prior to the plant flowers, the leaves needs to be harvested, or else they are going to become bitter in flavor.

Dig your dandelion crops up utilizing a needle-nose spade in the event that you program to harvest the roots. The roots of dandelion crops are harvested in planting season of the second-year or late the first-year.

Leave your dandelion crops that are unharvested for the yr. You might want to cover your dandelion crops having a a chilly body to protect them through the entire winter.

See related

Trees for Planters

Trees for Planters

The important thing to planting trees in planters is the use of heavy duty containers with drainage holes. This stabilizes the tree and provides space for the tree’s root ball to increase. Trees act as back-ground plant or a tall component in container crops. When floor area is constrained, as is the situation for condo dwellers, the gardener area is given by planters to plant trees. The gardener controls all the problems that are developing, like water and soil, whenever using planters.

Aromatic Trees

The Peppermint tree (Agonis flexuosa) is indigenous to Australia and grows in Sunset’s Environment Zones 1 5 through 17 and 20 through 24. Exposure to below-freezing temperatures kills the aboveground part of the tree. The willow- tiny white flowers cover the tree in spring, and a aroma is given off by kind leaves when crushed. “Jedda’s Desire” grows 9-feet tall and 6 feet wide with burgundy-coloured leaves. “Na-Na” is a miniature range achieving three to four feet tall with bright-red leaves.

Edible Fig Trees

The edible fig (Ficus carica) is a deciduous fruit tree requiring total sunlight and normal watering in Sunset’s Environment Zones 4 through 9, 11 through 24, H1 and H2. Figs are the eastern section of the Mediterranean region as well as indigenous trees to Asia. They normally develop to 30-feet tall, yet to keep them around 10-feet tall in a container, each year, prune them back. In climates that are foggy, fig trees create just one summer crop. When when creating the options pick types adapted to cool climates. “Desert King” creates green-skinned figs with red flesh, while “Osborn Prolific” creates dark-reddish-brown figs with amber flesh. The “Genoa” fig is adapted to the coastal areas of California with greenish yellow fruit and strawberry coloured insides.

Herb Trees

The culinary herb, bay leaves, arises from in the sweet bay tree (Laurus nobilis). This Mediterranean tree prefers full sunlight to partial shade in Sunset’s Environment Zones 5 through 9, 12 through 2 4, H1 and H2. The leathery leaves are used to flavor stews, sauces and rice dishes. In its native habitat bay reaches 40-feet tall but wants yearly pruning to keep the dimension that is preferred when grown in planters. The cultivar “Saratoga” grows normally in a tree-type without pruning and is ruined by prolonged below-freezing temperatures.

Tropical Trees

Catalpa trees grow best in full sunlight and a few shade in the hottest climate. Large clusters of trumpet-shaped blossoms develop up right, looming on the tropical-searching heart shaped leaves. Place the catalpa tree container within an area guarded from winds that may shred the leaves. Catalpa bignonioides is the name for the catalpa tree that is typical. “Na Na” is A6-foot range that spreads 5 toes wide and never blooms. The canopy types a round-shape that is organic. Catalpa bungei is a pyramid-shaped range with flowers that are purple containing spots. These tropical trees develop in Sunset’s Environment Zones 3 through 1 and 1 4 through 2 4.

See related