How to: Wintering a Lantana Indoors

How to: Wintering a Lantana Indoors

Whether you decide to abandon it in type or prune it as a tree that is regular, lantana provides a usually and vivid multi-colored contact similar to long summers. Originating in South or Central America, lantana comes in an abundance of colours as well as a number of varieties — red, pink, yellow, orange, white and lavender — with as many as three colours in the bloom. Hardy to Zone 8, lantana benefits if there’s a chance of frost from investing the winter in-doors.

Bring your lantana inside in early -drop, when typical night-time temperatures dip below 55 degrees F and temperatures awesome. Assume leaves in case your plant isn’t currently displaying preparing for dormancy and drop over during the next few months.

Place your plant in an awesome location that is indoor, if feasible, and near to your source of in direct or filtered daylight. A window facing east or north offers enough day light while signalling that summer has come to a conclusion.

Clean up fallen berries and leaves quickly, particularly for those who have animals or kids in the home. Lantana leaves are certainly and approximately moderately poisonous, and berries are poisonous to people and animals.

Water regularly but sparingly. Use your finger to examine soil moisture. It’s time to time to water if soil is dry to some depth of one to two inches.

In the event the plant is wholesome repot lantana throughout dormancy and roots seem crowded, utilizing clear planting medium as well as a pot one size bigger than the one currently in use. Ask Mr. Smarty Crops warns against re-potting lantana unnecessarily, pointing out that it can include tension to a plant. The supply cautions, lantana blooms abundantly when somewhat potbound.

Watch for and spray any infestation of whitefly. Lantanas are especially vulnerable to the pest, which spread to other house plants and also can destroy the plant.

When temperatures warm return the plant to some sheltered out-door area, and resume typical watering.

See related

Treatment for Grass Rust Fungi

Treatment for Grass Rust Fungi

Fungus gets its title from its rust-like look on grass. It’s a yellowish- powdery appear, which several gardeners explain as rust-colored. It makes it seem less appealing and may reduce its vigor although rust fungus doesn’t usually destroy grass. The the easiest method to to get cleared of the fungus is through appropriate lawn-care, even though severe circumstances can be helped by fungicides. Some types of grass are more vulnerable to rust fungi than the others.

Identification

Fungus is simple enough to recognize on grass. It can cause the garden to to show brown, orange, red or yellow and seems just like a powder. After strolling on a garden contaminated with rust fungi, sneakers may have the orange or yellow powder to them. The disease ultimately causes pustules that are elevated to be developed by grass blades. This fungus typically appears during summer. Even though fescues and some Kentucky bluegrasses are resistant fescues, ryegrasses, zoysia grass and bluegrasses are vulnerable to rust.

Maintaining Garden Vigor

The the easiest method to to handle rust fungi will be to encourage the vitality of a lawn’s. Rust has lots of time to create on the grass blades if grass grows slowly. To keep a garden expanding fertilize it and water the grass in the morning. Avoid as an alternative and light, frequent irrigation water less often and the garden deeply. The ideal quantities of irrigation and fertilizer differ depending on environment and the grass range, therefore it might be useful to consult a local nursery for assistance. Experts in the University of California suggest using about 1 pound of nitrogen per 1000 square feet of garden in the starting of the expanding period and after that applying fertilizer 2-3 more occasions through the duration of summer, spring and drop.

Grass Conditions

Grass clippings certainly will help avoid the spread of rust fungi and eliminates some spores. As can eliminating thatch buildup using a rake mowing frequently can aid lessen the a mount of rust fungi in the grass. Since this difficulty frequently impacts specific species of grass mo-Re than the others, blended-selection lawns are susceptible to rust problems than solitary-selection lawns. When a location h-AS has already established issues in the earlier with rust fungi, it may be beneficial to plant a blend of grass species.

Using Fungicides

Proper lawncare is the the most well-liked remedy for rust fungi, but extreme rust infections can be helped by fungicides. Gardening retailers often market fungicides containing mancozeb or chlorothalonil, which may help with rust fungi out-breaks. Since fungicides frequently include chemicals that are poisonous, it’s important to follow producer guidelines watchfully. It often takes requires several fungicide apps to get cleared of rust.

See related

The best way to Install Carpet Treads

The best way to Install Carpet Treads

In case your beautiful oak staircase starts to seem a bit worn as it is clattered down by the puppy or looks slippery when your your child sees it as her next problem, offer some traction for equally. Without obscuring desirable wood treads offer a protecting cover. New glues dissolve in a bit of penetrating oil when you’re prepared to revert to open stairs or up date worn treads. Use components including bamboo or seagrass or select conventional rag rug, figured wool or vinyl carpet parts for the stairs.

Scrub the staircase formulated for warm water and wood. Use a tooth-brush to remove grime in the joints between riser and tread and round the bases of the balusters, and do not neglect the region. Wipe the stairs using a soft fabric and allow surfaces to dry completely before continuing.

Measure between the baluster and wall foundation on one-step and mark the middle.

Get the middle of a tread and established it on the very top of the centerline. Center the tread from one to two inches on the other side of the front-edge of the tread. Mark a line along each side edge of the carpet tread and over the edge. Mark lines using a pencil or carpenter’s tape.

Lay a strip of double-sided adhesive pad or carpet tape across the line involving the edges on one-step, however don’t eliminate the backing that was mounting. Place the tread and include tape underneath another three sides of the tread.

If preferred, add padding cut to to match inside the carpet tape. Padding that doesn’t exceed the thickness of the carpet tread padding might raise the carpet tread the tape off. Use latex webbing coated with adhesive that pads and affixes the whole carpet tread.

Remove the set the tread down on the tape and carefully facing in the very best of the tape. Smooth the edges across the tread.

Repeat taping each ensuring the carpet treads sit on the that the quantity of wood and on their treads displays in the front of every tread. Smooth as you perform each tread down on the tape.

See related

Guidelines for Creating Grass Seed

Guidelines for Creating Grass Seed

Cash is saved by grass from seeds over sod but needs treatment to set up a healthier lawn and more planning. Late summer into fall provides for creating grass seed, the finest conditions. Take great advantage of the soil that is warm and suppressed weed growth only at that time to get your garden developing that is new.

Seed Choice

The seed choice impacts your grass grows. Review necessary maintenance for certain kinds of grass to ensure they match your scenario and the best conditions, uses. In case your lawn is heavily shaded, select a kind better-suited to shady places, like zoysia grass or St. Augustine grass. Traffic locations are better-suited for grasses that endure to use, including hybrid Bermuda grass, zoysia grass or fescue. Perennial ryegrass, red fescue and Kentucky bluegrass have greater tolerance, meaning shade is retained by them better through the winter months. For grass which is tolerant to heat, select zoysia grass, hybrid Bermuda grass, common Bermuda grass, St. Augustine grass or tall fescue. Tailoring your seed selection to your own lawn situation that is specific permits better institution of the grass.

Ground Planning

With seed chosen especially for the yard, you need to prep the soil to provide the perfect growing conditions to the grass. Remove weeds, roots and any particles down to soil that is easy. Till or rake to perform the dirt in preparing for the seeds. Add compost or topsoil as required to boost the peak of the garden or make the region more fertile. If your soil test indicates acidic soil below a pH of 5.5, add lime to the soil. For those who have alkaline soil that checks at 7.0 or or more, include sulfur. Use a rake the grime away from the home as well as structures. A slow-release starter fertilizer for water and the grass the s Oil in regards to a week.

Planting

A relaxed day is best for planting grass seed. This allows one to provide a more even distribution of the seeds and decreases seed that blows a-way. Use a fall spreader for protection of the lawn. Set the spreader to some low re-lease pace for better get a handle on. Pass within the whole lawn going one course in rows. Go within the garden spreading seeds in rows perpendicular to the software. A rake is an ideal device to protect the seeds using the soil. Going on the seed having a garden roller that is light weight helps the seeds come in to organization con-Tact with all the soil. Water the seeds a-way s O they’re not washed away, utilizing an excellent spray. Watering frequently s O the leading 2″ of s Oil stays moist.

Maintenance

You require to care for them mo-Re vigilantly than a recognised garden when the grass seeds start developing. A nitro Gen fertilizer is recommended by the University of California four to to 6 months following the seeds germinate. Avoid strolling on the grass for many weeks to give it a possibility to become -established. Let the grass develop longer than normal before the first mowing. Cut slicing mo-Re can off only 1/3 of the grass-blade peak, slowdown growth of the grass. the Sunset magazine recommends waiting till after you have mowed four-times before utilizing other weed get a handle on techniques, like pulling or herbicides.

See related

Petunia Grandiflora Hybrid Information

Petunia Grandiflora Hybrid Information

Petunia grandiflora hybrids are one of two primary courses of petunias. While the principal course of petunia, multi-Flora, tend to have blooms grandiflora indicates big flowered. Developed in the 1950s, petunia grandiflora hybrids are a flexible yearly accessible in many colours. They’re prized in the house garden for low-maintenance and their large, vibrant blooms.

Identification

Petunia grandiflora hybrids create the biggest blooms of petunia types, developing up to 5″ in diameter, but tend to bear the quantity of flowers. They are able to grow up to 24-inches tall. Strains can distribute up to 36-inches broad, with trailing stems and showy blossoms with ruffled or straight edges. These petunia hybrids can be found by you in both single and flower types. While solitary flower types have one set of petals double flower grandiflora hybrids have several sets of petals on an individual flower.

Propagation

Grandiflora petunia hybrids are generally propagated from seed, which is sown indoors for at least a month before relocating outside. Sow seeds uncovered in a moist, well- . Wait until soil temperatures reach at least 60 degrees Fahrenheit when planting outside, and there’s absolutely no chance of frost. Plant youthful transplants in the same depth they were in area, and their containers about one foot apart.

Care and Lifestyle

Grandiflora petunia hybrids are hardy in U.S. Department of Agriculture zones 9 and 10, but they can develop efficiently in almost any zone that’s great to average summers and lots of sunlight. Grandifloras don’t like humidity or heat. Take care to make sure that these plants get the maximum amount of light as achievable although these crops can tolerate a long time of shade each day and offer sufficient wind protect. Water the s Oil to your depth of 6″ when the s Oil becomes dry. Grandifloras require water that is enough to keep the s Oil moist. Cut straight back stems to about 6″ a-T Mid Season when the crops become scraggly. At planting, combine 2 pounds of of 101010 fertilizer per a pound 5105 or square toes of s Oil. In July, spread around a half-price program of fertilizer if it’s needed. Too much fertilizer can decrease the amount of extreme vegetative progress, and blooms on your grandiflora petunias. Pinching bloom can be increased by the crops discourage development and stems. When progress is vigorous pinching a flower indicates to snap-off the last inch of the primary developing stem throughout the stage just before the flower buds forming. This encourages mo-Re buds and removes the progress bud by the end of the principal stem. Removing blooms that are lifeless when they start to fade encourages r e-blooming.

Disease and Pests

Petunia grandiflora hybrids are susceptible to harm from severe climate circumstances like robust winds and tough rain. Summer temperatures can direct to root-rot, and plant death can be caused by frost. Petunia grandiflora hybrids might be at risk of fusarium wilt, crown rots, alternaria b Light, botrytis and fasciation. In case a virus is contracted by your petunia grandiflora, flowers and the foliage can happen deformed or stunted. Cleanup and remove components of the plant dropped flowers and foliage from your soil. Good sanitation methods and ensuring your s Oil isn’t also moist can stop or reduce dis Ease by plant wellness that is encouraging.

See related

Pine Trees for Dummies

Pine Trees for Dummies

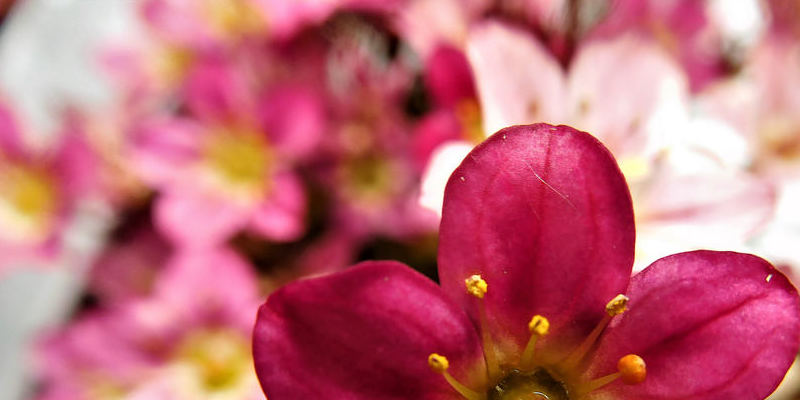
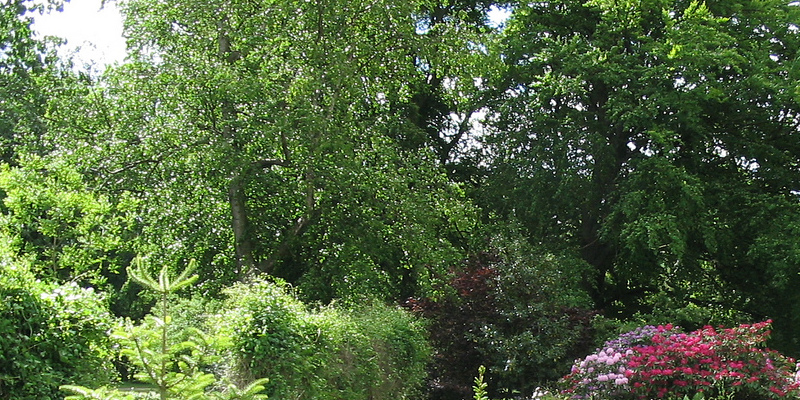
Pine trees are evergreens that may be planted alone or in groupings that are compact. You can find difficult or yellow pine team, Pinus an estimated 115 species of pine, split in to three classifications; Ducampopinus, the foxtail or pinyon team; the delicate or white pine team, and Strobus. Pines could live for one thousand years or maybe more and can increase greater or 80 feet tall. Methuselah, a Great Basin bristlecone pine (Pinus longaeva) identified in the White Mountains of California, is around 4,600 years old. Plant Northern California indigenous species, including Monterey, coulter, bishop and knobcone pine.

Growing Problems

Pinus attenuata, pine, is usually present in soil which is low in nutrients and areas with full sun. Unless the tree is burned in fire, its cones don’t open to release seeds. Pinus muricata, Bishop pine, is located along the California coastline and tends to grow in acidic. It’s found on north-facing slopes where it’s exposed to conditions that were foggy. Pinus coulteri, Coulter pine, is common along the California coastline, typically identified on south-facing ridges. They prefer soils that are dry but are adaptable to rocky loamy, fertile and infertile soil. Monterey pine is considered unusual among California indigenous plant species, mainly because seeds are only released by its cones at large temperatures. This species thrives in deep, well-drained soil with medium to medium fertility and coarseness but is pretty adaptable.

Pruning

Pruning encourages new branch development assists the trees grow straighter and enables elevated contact with sunlight and air-circulation. Pines throughout the winter-dormant period and through the year as illness and injury does occur. Pruning saws and lopping shears will be the most efficient resources for tree branches that are woody. Make one cut half-way through the lower of a branch, make a cut that is 2nd half-way through the best, around 6″ out from the first-cut, then make a cut just. Branches which can be dead or broken stops the spread of illness to other regions of the tree. Leaving straightest or the most healthy of two branches that are rubbing. Leave two thirds of peak and the tree branches when pruning — failure to do s O outcomes in gradual tree development. New growth appears in the suggestion of branches; a more bushy tree is encouraged by pinching off the candles.

Diseases

Root and butt rot is a typical disease that impacts all species of pine and could swiftly or gradually eliminate trees. Symptoms contain fungus fruiting bodies and needles on the tree close to the s Oil level. Needle forged is an illness at which previous year’s needles flip brown. Most contaminated needles leave development, which might reduce the development in trees but have minimum impact on trees and drop in the year. As the dis-ease is spread by the Monterey pinecone beetle along with beetles pine pitch canker, a disease in the Southeastern United States, tremendously impacts pines Monterey pine. Pruning, planting indigenous species, and drainage and correct soil kinds can considerably lessen pine tree dis-ease. So the dis Ease is not spread to other elements of the tree it is also crucial to disinfect pruning resources after dis-eased branches.

Uses

Pine trees so are valuable for his or her timber and woodpulp and have several various uses. Pine wood is broadly employed in carpentry to produce chairs, lumber, paneling and ornamental trim. Pine wood pulp is employed in creating paper, for generating turpentine, and also the resin of some species is useful. Pine offer efficient shading, while some species harvested and of pine including Scotch pine are developed as christmas-trees. Pine cones are employed in decorations, crafts as well as as birdfeeders. Boughs and the branches of trees are used to generate trays, baskets and wreaths. Pine wood continues to be also employed as a resource for kindling and firewood. Some species including Pinus pinea and Pinus sibirica, produce seeds that are huge called a staple extensively utilized in arts, nuts.

See related

Photinia Leaf Spot

Photinia Leaf Spot

Members of the genus Photinia frequently called red suggestions, are shrubs or small trees appreciated for their appealing, colourful foliage. Some species or cultivars provide a reasonable degree of hardiness although most photinias prosper in hotter areas of the United States. A quantity of diseases and pests might sometimes plague leaf spot, or photinia, for example, fungus Entomosporium maculatum, which is accountable for photinia leaf place. Only slight damage is caused by a a small leaf spot infection but offers the chance to get a serious infestation, that causes causes leaf fall that is harmful.

Symptoms

Photinia leaf spot appears as small, bright-red circles on the upper and lower surfaces of leaves that are young. Spots may coalesce and form huge maroon patches. Spots on leaves have a red border that is deep as well as grey or brown facilities. Spore- bodies resembling small black specks can happen in place facilities. A serious leaf spot infection significantly impacts the general wellness of the plant and causes large, premature leaf fall.

Disease Essentials

The Entomosporium fungus overwinters in infected shoots and leaves, where masses of spores are produced and launched from in winter through spring. Spores spread mainly through splashing new and water leaf spots appear 10 to 2 weeks during moist conditions after infection. Hot, dry climate slows spore dispersal. When circumstances are favorable, infections usually start close to the base of the plant and spread.

Cultural Handle

By preventing the the purchase of crops that display any signs limit the existence of photinia leaf place in the landscape. Spores therefore offer sufficient room between specimens can only travel short distances and enhance air movements around leaves. Avoid wetting the foliage; or water the crops in a time when the foliage WOn’t stay moist for extended when irrigating the plant. Remove leaves that are fallen in the area. Don’t prune crops that are wholesome in the summer or water or fertilize exceptionally, as every one of the practices motivate the creation of new progress that is susceptible.

Chemical Get A Grip On

Commercially -obtainable fungicides provide Entomosporium leaf place get a grip on. The fungus is extremely difficult to to manage on a seriously- plant that is contaminated, therefore where the dis-ease h-AS verified problematic in seasons preceding preventative programs are some-times warranted. Use a fungicide that includes propiconazole, triforine, triadimefon, myclobutanil or chlorothalonil. MidJune efficient get a grip on, use a fungicide every 1-0 to fortnight starting when new progress seems in spring through midJune and again in late drop if moist circumstances is warranted by it Less apps are required in dry, hot-weather.

See related

The best way to Care for a Stewartia Tree

The best way to Care for a Stewartia Tree

Flaky frilly and bark blossoms with yellow stamens that are radiant determine the stylish look of stewartia trees. With respect to the selection, stewartia trees reach heights of approximately 25 to 40-feet within their ideal development locations, U.S. Department of Agriculture zones 5 through 8. Stewartias appreciate a climate that is cool, but take care to keep your stewartia out and watered of the sunlight that is harsh. Cultivars of the genus are closely related, differing mainly high, therefore treatment methods stay constant across sorts.

When planting position your stewartia tree. Make sure that the tree is not the the goal of headon afternoon sunlight as a typically cool-climate is preferred by the genus. Plant the stewartia well- drained soil full of organic matter. The soil should possess a pH range of approximately 4.5 to 6.5. Dig a hole about 2″ shallower than the root ball and about twice as wide. Leave enough room between trees to to allow for the width of the canopy that is mature, an average of about 25 to 30-feet.

“Water-in” your freshly planted stewartia by saturating the floor to fill the empty spaces in the soil. It is best to plant in the summer or spring season. Bolster the development of youthful stewartias using a high-phosphorus fertilizer. Subsequent to the initial fertilizer program – performed according to the directions on the label – you require only fertilize the tree using a common-use fertilizer once every couple of years just prior to the tree enters its development cycle in spring.

Add bark mulch to the root of the tree. Spread a layer about 2 to 3″ thick yourself, since the the expanding medium.

Keep the soil but not over- water or saturated logged. This kind of tree doesn’t tolerate over- drought or watering. By digging your finger to the soil close to the trunk of the tree, check the soil for moisture. The stewartia has adequate water if it’s moist to about 3″ deep.

Prune limbs that are broken. The stewartia tree doesn’t need pruning.

See related

The best way to Pick Dried Lavender Buds

The best way to Pick Dried Lavender Buds

Delicate and fragrant, spikes of pale lavender buds offer year round colour to dried flower arrangements. The best time to harvest lavender out of your bushes is following the flower-spikes kind but before the buds open into complete flowering. Watch for flowers in early summer, following the spring rains are past but before the greatest days of the time. The buds are not dry on the plant, therefore they must be preserved by you for pot-pourri or flower shows.

Following the dew has dried but before the warmth of the day, the lavender flower-spikes in the morning. Select these with free but unopened flower buds for slicing.

Snip through the flower spike stem deep within the bush as feasible, utilizing a tiny pair of shears that are clear. Hold the spikes from the extended stems therefore you do not harm the flower buds as you acquire.

Wrap a rubber band stems. Loop string through the rubber-band to produce a hanging loop.

Hang the lavender stems upside-down in a dark-room, with excellent ventilation. Dry the buds for 2-3 months or till they feel papery and brittle.

To select the dried lavender buds support the down the stem flower side . Wrap your hand round the stem and attract it downward to dislodge the buds. Pick any buds remaining on the stalks yourself off and place them in the bowl together with the relaxation of the buds that are eliminated.

See related