How to Trim a Banana Tree After Freezing

How to Trim a Banana Tree After Freezing

Banana plants (Musa spp.) Are tropical herbs which do not do well in cold climates. They can be increased in U.S. Department of Agriculture plant hardiness zones 9b through 11, in which it seldom freezes. Sub-freezing temperatures can cause the banana plant to die back to the ground, but before you take out your saw to remove the dead material, you need to evaluate the situation prior to making a fatal error for your banana plant.

Analyze the leaves and pseudostem of the antioxidant plant after a freeze. If they are brown and wilted, you should remove them when the weather allows.

Look at your weather forecast to the next two weeks. Leave the damaged part of the banana plant in place if there’s a prospect of more freezing weather.

Saw the banana plant down to the ground after the icy weather is finished.

Cover the cut portion of the banana plant with a thick layer of mulch to protect it from the cold for the remainder of the winter. At the spring, the banana will regrow from the rhizome when the soil warms.

See related

The way to Identify Cherry Trees

The way to Identify Cherry Trees

Like all great artists, mother nature repeats her patterns objectively using just moment variations, making the phrase “unique” hard to apply. The cherry tree (Prunus spp.) is no exception. Even though the froth of spring blooms, polka dots of lemon and gray-brown, peeling bark may appear to differentiate the tree from all others, a number of different trees in the Prunus genus closely resemble the cherry. A cherry tree fundamental physical characteristics would allow you to pick it from a lineup even though they may be inadequate to differentiate it from relatives in the genus Prunus. You can always identify a cherry and distinguish it from its relatives, however, if you know what details to examine.

Look carefully at the flowers. Cherry tree flowers grow in white or pink clusters, with all blossom stalks arising from one central point. On the flip side, almond tree flowers grow in pairs, peach trees grow single flowers, and blackthorn trees bear flowers either separately or in pairs.

Count the styles. A style is that the long tubing topped with the stigma that connects into the flower’s ovary, the part that becomes the fruit. Each cherry tree blossom has just 1 style. Flowering crab-trees are able to look uncannily like cherry trees, but each flower has four to five styles. The flowers of the mespil tree have five styles, and apple and pear tree types have two to five.

Assess the fruit. Cherry plum trees and cherry trees appear to be mirror images even if decorated with fruit, but cherries are a bit smaller than cherry plums. If the fruit steps 3/4 of an inch or less, it is a cherry; cherry plums and routine plums are 1 inch or bigger.

Analyze the leaves. The cherry tree toothed leaves have been lance-shaped or oval and pointed at the tip. They are arranged alternately on divisions. As the tree is deciduous, its leaves fall in autumn.

Circle the tree to inspect the bark. A cherry tree bark is brownish or grey or a shade in between, and it often has thin rims running horizontally across the back. In some varieties, the bark peels in places to reveal a mahogany color beneath. A cherry tree may range between 6 and 40 feet tall, so height isn’t a distinguishing element.

See related

How to Force Crabapple Blossoms

How to Force Crabapple Blossoms

Flowering crabapple branches declare the coming of spring. You can enjoy the fragrant blossoms a few weeks prior to the tree comes into bloom by forcing divisions inside. Collect crabapple branches in February, once the buds start to swell. The hardiness of crabapple trees varies with the species and cultivar. Most will bloom in U.S. Department of Agriculture hardiness zones 5 or 4 through 8 or 9.

Cut lateral stems of fresh development which are attached to a principal branch utilizing hand pruners. Choose the ones that have lots of flower buds. Make sure the loss of this stem won’t impact the form of this tree. Cut close the point where the stem attaches to the main branch so you don’t leave a stub.

Fill a large container with room temperature water and submerge the crabapple branches in water. Leave them to soak several hours or overnight.

Stand the crabapple branches in a bucket of water and set the bucket in a cool place for 2 times; warm temperatures in this stage decrease the quality of the flowers. Mist the branches from time to time to help keep the buds moist.

Eliminate the crabapple branches from the water and re-cut the ends of the stems. Scrape off the lower 2 inches of bark on every stem. Change the water in the bucket and put the branches back in the water.

Move the bucket to a place with bright, indirect sunlight. Change the water once or twice a week to stop bacterial growth and re-cut the base of the stems weekly. Watch for buds to open in 2 to 3 weeks.

Arrange the branches in a vase of water. Prepare a floral preservative according to the package instructions and use it to prevent the development of germs and prolong the display. Keep on re-cutting the stems and changing the water at least weekly.

See related

Chemicals to Kill Bamboo

Chemicals to Kill Bamboo

Bamboo (*Bambusa*, *Fargesia*, *Phyllostachys* and *Pleioblastus* spp.) Is really just an extremely tall-growing kind of evergreen grass. It’s hardy in U.S. Department of Agriculture plant hardiness zones 4 to 10. Running-type bamboo species like yellow groove (*Phyllostachys aureosulcata*), hardy in USDA zones 4 to 9, will grow rampant if they aren’t included. Utilize a non-selective herbicide to kill stands of bamboo which have outgrown their allotted place or if the area has to be cleared for new landscaping.

Glyphosate Herbicide

Utilize an herbicide which includes glyphosate to kill bamboo at the spring, summer or early autumn. It’s applied to the leaf or cut stumps. The herbicide, absorbed through the leaf or stump, goes via the bamboo to kill the roots of this plant.

Glyphosate Foliar Application

Cut the bamboo stalks off as near the ground as possible with loppers or a saw at the spring. Let the bamboo grow over the summer. In late summer or early autumn once the leaves are older, spray them with the herbicide. Dilute glyphosate concentrate at a rate of 2 percent or even 2 2/3 ounces of concentrate per gallon of water. Mix it in a tidy, 1-gallon milk jug or similar container. Pour the solution into a spray bottle or hand-pump pressure sprayer. Ready-to-use herbicides containing 1 percent glyphosate will even be successful. Spray the leaves and stems till they are moist but not dripping. 1 treatment should do the task, but keep an eye on the bamboo for a single year and re-treat, if needed, when fresh leaves are older. The leaves must begin to turn yellow and wilt within a single week. Don’t dilute the glyphosate in a higher concentration rate. It will kill the conductive tissue before it can reach the lower plant components and the bamboo will grow back.

Glyphosate Cut Stump Application

Utilize a ready-to-use herbicide which contains 8 to 10 percent glyphosate or dilute glyphosate concentrate to 8 to 10 percent to eliminate cut stumps in the summer or spring. Mix 13 ounces of 41 percent glyphosate concentrate into 1 gallon of water for 10 percent concentration. Mix it in a container, pour it into a spray bottle or bucket. Take it outside when cutting on the bamboo. Cut the bamboo stalks as near the ground as possible with loppers or a saw. Spray the herbicide or use a paint brush to coat the cut stump immediately after cutting the bamboo down. Thoroughly cover the entire top surface of the stump. It should not need to be retreated but, if the leaves grow back, then apply a foliar spray with glyphosate diluted to 1 to 2 percent.

Glyphosate Precautions

Apply glyphosate early in the day so it will be dry before day. Don’t spray glyphosate on a rainy afternoon or when rain is predicted within one day. Protect neighboring plants from drift as the herbicide can damage them. Use cardboard or plastic sheeting to cover nearby plants and also leave it on them for a couple hours to be sure the herbicide has settled. Wear protective eyewear, gloves and rubber gloves when using lasers. Keep people and pets off from the treated bamboo before the herbicide is completely dry.

See related

Nitrogen Food for Kaffir Limes

Nitrogen Food for Kaffir Limes

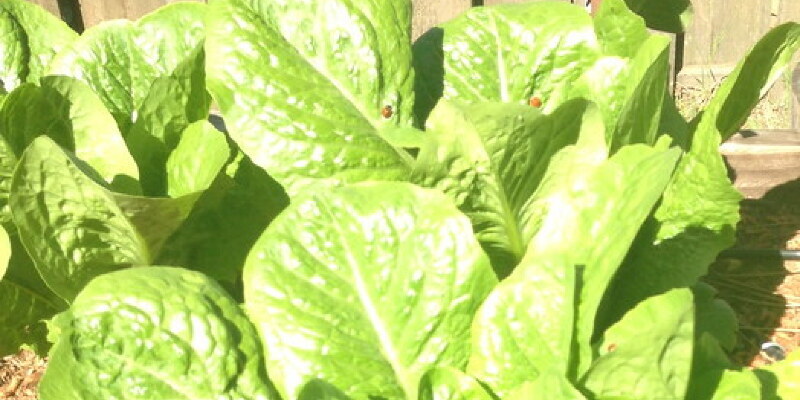
Even if its aromatic green leaves and bumpy, green fruit rind weren’t crucial ingredients in Thai cooking, the kaffir lime (Citrus hystrix) would be well worth growing for its deliciously fragrant white blossoms. Also called Thai lime, the frost-tender tree grows to 25 feet tall when planted outdoors in U.S. Department of Agriculture plant hardiness zones 10 through 12. Elsewhere, grow it like a compact houseplant and summer it outside. Like all citrus varieties, kaffir lime needs regular applications of high-nitrogen fertilizer.

The Way Nitrogen Helps

A kaffir lime requires nitrogen to encourage lush, healthy foliage. Without lots of leaves to photosynthesize its food, then it does not have enough energy for flowering, fruiting and crushing disease and pest damage. To get a tree grown for its edible leaves, adequate nitrogen is important.

How to Determine Nitrogen Content

Look at the first of the N-P-K statistics on a fertilizer’s label. An “N” number of 10 means that the fertilizer contains 10 percent nitrogen, therefore a 50-pound bag could have 5 lbs of actual nitrogen. To provide your lime with 1 pound of actual nitrogen, you would use 10 pounds of the fertilizer. If the “N” number were 20, the bag could contain 20 percent, or 10 lbs, of actual nitrogen. Five pounds of the fertilizer would provide your lime with 1 pound of actual nitrogen. The greater a fertilizer’s “N” number, in other words, the less of the fertilizer the tree requires.

Fertilizing a Young Lime

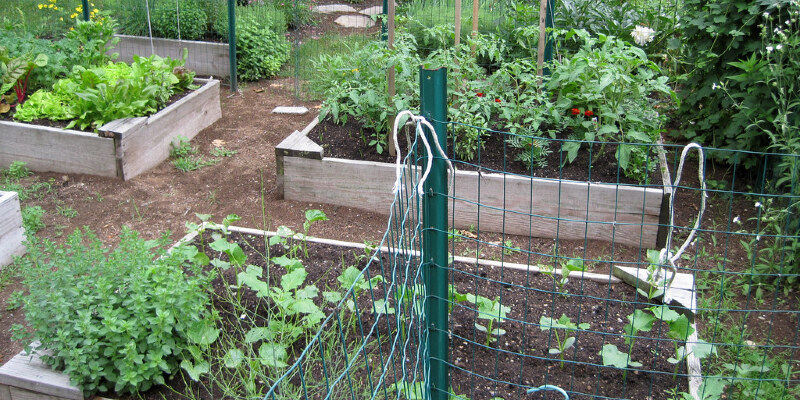
In the first year after planting, fertilize your kaffir lime monthly from early spring to late summer. Use 1 tbsp, or the brand’s recommended number, of granulated 21-0-0 ammonium sulfate fertilizer. Scatter it evenly over the root ball and then water the tree well. Starting in the second season, fertilize every four to six months between spring and late summer. A second-year kaffir lime gets 1/2 cup of 21-0-0 granules per program; raise the 1 cup in the third year and 2 cups in the fourth. Spread them a few inches from the back to 1 or two feet beyond the dripline, where rain falls from the outermost branches to the ground. Water the soil slowly to a thickness of 1 inch, or about 6 gallons of water per 10 square foot.

Fertilizing an Established Lime

A proven kaffir lime needs between 1 and 1 1/2 lbs of actual nitrogen per year. That amounts to between 5 and 5 7 1/2 lbs of 21-0-0 ammonium nitrate. Divide the fertilizer into four equal portions and implement it every four to six weeks beginning in February. Keep the granules away from the back and sprinkle them evenly over the roots. Extend the coverage 2 to 5 feet beyond the dripline and water the top 1 inch of soil.

Recognizing Nitrogen Deficiency

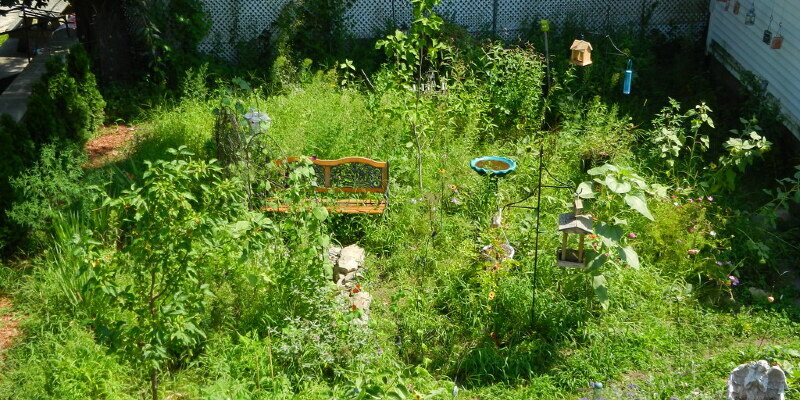
If your lime’s leaves have started yellowing from the lower branches up and out of their hints toward their stems, it’s nitrogen deficient. In a Mediterranean climate, a lack is most likely to happen when winter rains leach sulfur in the soil.

See related

What Animal Pest Eats Bean Plants?

What Animal Pest Eats Bean Plants?

Dwelling in a rural area means lots of space for a backyard garden, but also you share your property with little animal pests that love to feed on your own garden. Many crops, including legumes, are susceptible to feasting insects. Beans contain a huge selection of beans, many who are grown in the home garden, such as green beans and broad beans. When planting beans, it is possible to help control animal pests by fencing in the developing area or using traps and repellents to help keep away the insects.

Groundhogs

Groundhogs, also called woodchucks and whistle pigs, produce burrows in grassy strips of territory and often make dens beneath porches and decks. These herbivorous insects come out to feed in midsummer and eat a host of garden vegetation, including legumes, peas and carrot tops. Groundhogs are about 20 to 25 inches in length weigh between 4 and 11 pounds. They have brown fur, small ears and eyes and strong front legs for digging. Signs that a groundhog is eating your beans include a smooth cut at a diagonal plane on the bit ends of this vegetation.

Rabbits

Rabbits are cute, furry creatures. Cottontails and the jackrabbits are two types of bunnies that feed on garden vegetation. Cottontails live among brush and might live under slightly raised constructions around your yard. Cottontail rabbits generally weigh between 1 1/2 and 2 3/4 pounds, are between 12 and 15 inches long, and have pale gray coat and smaller ears than the jackrabbit. Jackrabbits weigh between 3 and 7 pounds, grow 17 to 21 inches long and are grayish-brown in colour with black tips in their ears. A bunny’s bite also smoothly cuts the vegetation.

Deer

You often spot deer near wooded areas and close rural farmlandnonetheless, some deer do live in suburban locations. Deer are herbivores and generally feed on leaves and twigs, but when they live close farmland or have access to some vegetable garden, deer do eat soybeans, corn and other garden vegetables. Deer are big in contrast to other animal pests. They weigh between 100 and 300 pounds with a short tan fur in summer and large ears; male deer have antlers. Deer droppings and ripped or nibbled foliage are signs deer are eating your beans.

Other Pests

Voles, chipmunks and squirrels are known to eat the leaves of plants that are young. Vole damage is often confounded with cutworm damage since these creatures eat the stems and leaves as they work via a row of crops. Birds can also hurt recently sprouted seedlings of corn, peas and beans by pulling them from the ground. For birds, you can use row covers to protect young plants.

See related

Mosquito Foggers for a Home Yard

Mosquito Foggers for a Home Yard

Mosquitoes are not only pesky, but they can carry disease, too. If mosquitoes are a problem in your yard, you might consider foggers. These products have their own benefits and costs. Before using a mosquito misting system installed or employing an outside fogger, consider the types of chemicals used, their safety and effectiveness. For many, a mosquito home fogger is a good alternative, but others may get better results using more conventional approaches or avoiding mosquito bites.

Setup

Foggers or misting systems frequently require elaborate equipment installations. Professional installation of these systems, which includes tubing and nozzles organized around your yard’s perimeter, is required. The tubes are fed by a reservoir of insecticide that’s meant to kill adult mosquitoes that fly during your yard. A timer turns on the program to publish the insecticide at regular intervals.

Best Use

The North Carolina State University Cooperative Extension support notes that outdoor fogging system don’t keep mosquitoes at bay for more than a few hours. In case the wind picks up or it rains, the insecticide in the atmosphere can dissipate in less time. Once the insecticide is gone, the mosquitoes will likely come back to your yard. For the best results via an outside fogger, the University of California, Davis, Integrated Pest Management Program recommends using the fogger a couple of hours before an outside event but relying on other choices for long-term mosquito management.

Problems

The American Mosquito Control Association (AMCA) takes issue with home mosquito misting systems for many reasons. The organization notes that the use of insecticides could be excessive because the systems are often on timers and don’t come on in reaction to elevated numbers of mosquitoes. This excessive use of insecticides can promote resistance to these chemicals in insects. The AMCA also notes that there does not seem to be decent scientific evidence that these systems function.

Special Precautions

In case you have a butterfly garden, an outdoor mosquito fogger isn’t a good notions. The chemicals used not only kill mosquitoes, but they could also harm butterflies. The insecticides sprayed out by outside mosquito foggers can also harm other beneficial insects in your garden.

Alternatives

Before you have a fogging system installed, make alterations to your yard to eliminate breeding sites for mosquitoes. In case you have any standing water in your yard, like bird baths or low spots, remove the water. In case you have a bird bath or gutters, make sure to wash them frequently to eliminate any mosquito eggs that might have been laid in the water. Preventing mosquitoes from laying eggs by removing stagnant water resources have become the most effective way of preventing mosquitoes in your yard for a long-term foundation, according to the North Carolina State University Cooperative Extension.

See related

Problems With Paver Walkways

Problems With Paver Walkways

Paver walkways are not problem-free, especially if setup wasn’t done properly. Walkway woes can range from cosmetic to producing potentially dangerous situations for your feet or tree roots. Identifying the issues inherent with paver walkways are able to help you pay additional attention to your setup process to protect against those problems in the future.

Loose Pavers

Loose pavers are a tripping hazard, particularly if you have people in your family who have trouble with freedom. If you didn’t have a firm, stable foundation before laying the pavers, then you may observe the pavers come loose or tilted in the future. To avoid this, check the mud or gravel basis under the scoop is flat before you start laying them. Edging on either side of your walkway can also avoid the scoop from sliding to one side.

Weeds Between Pavers

Weeds can develop between pavers, making an unsightly walkway. Should you see weeds, it is possible to pull them out by hand or apply a post-emergent herbicide. Pre-emergent herbicides between pavers can stop weeds from growing in the first location. For a chemical-free solution, disperse dry polymeric mud between the pavers in the walkway. After wetting the mud and letting it set, it creates a barrier that weeds cannot grow through.

Drainage

Walkways may prevent water from reaching your soil, or it can create the water runoff in the pavers to flood parts of your lawn. The broader the walkway, the larger the problems you’ll have with water runoff and drainage. To avoid these issues, use pavers that are labeled as either permeable or have enough space between pavers for water to reach the soil.

Tree Root Damage

Constructing a walkway takes you to dig into the ground to make a foundation for those pavers, yet this digging and also the weight of the pavers on the finished pathway can damage tree roots. The California Oaks organization warns against building paved walkways close to the main zones of pine trees because the walkway can prevent air from reaching the soil, digging can physically hurt the roots and soil compaction can influence the texture of the soil around the tree. To avoid these issues, California Oaks recommends assembling raised decks or walkways near oak trees.

See related

Issues With Reed or Willow Fencing

Issues With Reed or Willow Fencing

Willow cuttings and reeds are attractive natural solutions to fabricated fencing materials. Willow and reed fences are relatively simple to build and preserve, but thanks to their minimally processed character, they present a few issues that are unique to fences made from these close-to-nature materials.

Decay

The most frequent problem with fences made from willow, reeds or other bare natural materials is decay. When exposed to weather, the following materials will naturally deteriorate over time if left untreated. Preservative treatments, like linseed oil-based preservatives, help control natural decay and deterioration. Willow ought to be allowed to dry thoroughly before it’s treated with a preservative. Depending on weather conditions, decent drying can take up to a year from the time that the fence is installed.

Sprouting

Willows spread extremely readily and their vigorous propagation can be a problem when willow branches or trunks act as fence posts. Given sufficient moisture, a newly cut willow post is very likely to sprout if it’s pounded into the ground as a portion of the fence structure. A remedy for this dilemma is to use just thoroughly dried willow for posts or to use commercially milled lumber posts.

Living Fence Growth

Living willow fences are a popular choice to cut willow fences. Fresh willow cuttings are shoved into the ground and then woven together to form a fence. The cuttings sprout and grow and leaves fill in the fence, providing shade and privacy. But if the divisions are not properly implanted, the growth can be irregular. Cuttings that are implanted vertically tend to sprout just at the ends, leaving gaps in the middle of the fence, so cuttings should be implanted in a 45-degree angle, which encourages them to sprout along their whole length.

Unbraiding

If not properly tied and braided, willow or reed branches tend to unbraid over time. This may be exacerbated by exposure to wind and weather. Regular maintenance of the fence, such as retying and rebraiding any divisions that have come free from their place in the fence, which will help to maintain the fence structure from substantially degrading over time.

See related

Plants to Boost Winterberry

Plants to Boost Winterberry

Winterberry (Ilex verticillata) is a deciduous native shrub that grows from 6 to 15 feet high and nearly equally broad. It’s hardy in U.S. Department of Agriculture hardiness zones 3 through 9 and thrives in sun to partial shade. Although winterberry loses its 1- to 3-inch green leaves in the autumn, it’s prized for its bright red berries that stay on the bare stems. Given the space it needs to develop, it partners well with a number of other plants.

Pollination

The most significant plant to develop having a winterberry holly is just a winterberry of their opposite sex. Berries are produced on female plants, but pollen from a nearby male plant is vital for the fruit formation procedure. Plant tags often carry information regarding great pollinators for a particular selection. For example, the male number “Southern Gentleman” is a suitable pollinator for female varieties including “Cacapon,” “Shaver” and “Sparkleberry.” “Red Sprite,” a compact, 3- to 4-foot selection, can be pollinated by the male “Jim Dandy.”

Shrub Companions

Tall varieties, such as “Winter Red” and “Jolly Red,” belong at the rear of the edge. Since winterberry is deciduous, companion plantings should incorporate some evergreens for construction. Another holly variety, “Sky Pencil” Japanese holly (Ilex crenata “Sky Pencil”) is evergreen, hardy in zones 6 through 8 and also comes with a columnar shape that makes contrast. For the front of a mixed shrub or shrub/perennial/annual border, the evergreen boxwood “Green Gem” may work. It’s hardy in zones 4 through 9, rises 1.5 to 2 feet tall with an equal spread and is easily clipped to shape.

Perennial Companions

Winterberry pairs well with perennials that like the same sunny or lightly shaded conditions with somewhat moist soil. A mixed planting of daffodils (Narcissus) and daylilies (Hemerocallis) may provide long spans of attention from spring through early to midsummer. Both are usually hardy in zones 3 through 9 or 10. Garden stalwarts such as tickseed (Coreopsis), coneflower (Echinacea) and asters (Aster and Symphiotrichum) create suitable companion plants during summer and into autumn. Many tickseed and coneflower varieties are hardy in zones 4 through 9, and many asters are hardy in zones 4 through 8.

Grasses

Grasses can be companions to winterberry. Striped eulalia (Miscanthus sinensis “Variegatus”) is a tall grass, with feathery seedheads that persist throughout the winter. It’s hardy in zones 5 through 9. Purple moor grass (Molinia caerulea subsp. Arundinacea), also hardy in zones 5 through 9, features purple-green summer flowerheads and yellow fall foliage. Slightly shorter, at about 3 ft, is fountain grass (Pennisetum alopecuroides), with narrow, arching leaves and purplish, bottlebrush-like flower panicles. It’s hardy in zones 6 through 9.

See related