Petunia Grandiflora Hybrid Information

Petunia Grandiflora Hybrid Information

Petunia grandiflora hybrids are one of two primary courses of petunias. While the principal course of petunia, multi-Flora, tend to have blooms grandiflora indicates big flowered. Developed in the 1950s, petunia grandiflora hybrids are a flexible yearly accessible in many colours. They’re prized in the house garden for low-maintenance and their large, vibrant blooms.

Identification

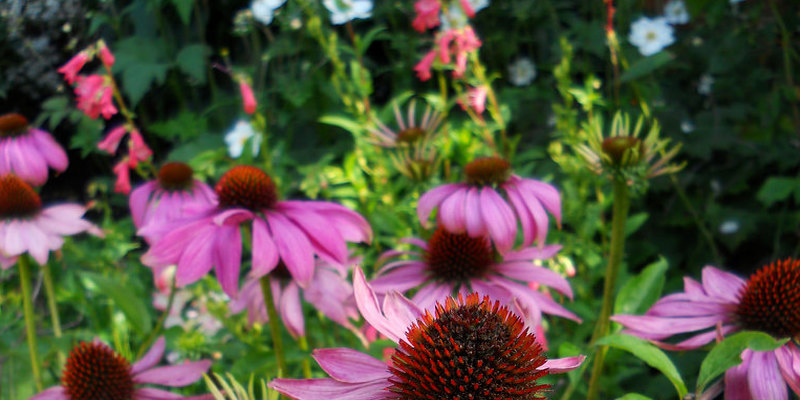
Petunia grandiflora hybrids create the biggest blooms of petunia types, developing up to 5″ in diameter, but tend to bear the quantity of flowers. They are able to grow up to 24-inches tall. Strains can distribute up to 36-inches broad, with trailing stems and showy blossoms with ruffled or straight edges. These petunia hybrids can be found by you in both single and flower types. While solitary flower types have one set of petals double flower grandiflora hybrids have several sets of petals on an individual flower.

Propagation

Grandiflora petunia hybrids are generally propagated from seed, which is sown indoors for at least a month before relocating outside. Sow seeds uncovered in a moist, well- . Wait until soil temperatures reach at least 60 degrees Fahrenheit when planting outside, and there’s absolutely no chance of frost. Plant youthful transplants in the same depth they were in area, and their containers about one foot apart.

Care and Lifestyle

Grandiflora petunia hybrids are hardy in U.S. Department of Agriculture zones 9 and 10, but they can develop efficiently in almost any zone that’s great to average summers and lots of sunlight. Grandifloras don’t like humidity or heat. Take care to make sure that these plants get the maximum amount of light as achievable although these crops can tolerate a long time of shade each day and offer sufficient wind protect. Water the s Oil to your depth of 6″ when the s Oil becomes dry. Grandifloras require water that is enough to keep the s Oil moist. Cut straight back stems to about 6″ a-T Mid Season when the crops become scraggly. At planting, combine 2 pounds of of 101010 fertilizer per a pound 5105 or square toes of s Oil. In July, spread around a half-price program of fertilizer if it’s needed. Too much fertilizer can decrease the amount of extreme vegetative progress, and blooms on your grandiflora petunias. Pinching bloom can be increased by the crops discourage development and stems. When progress is vigorous pinching a flower indicates to snap-off the last inch of the primary developing stem throughout the stage just before the flower buds forming. This encourages mo-Re buds and removes the progress bud by the end of the principal stem. Removing blooms that are lifeless when they start to fade encourages r e-blooming.

Disease and Pests

Petunia grandiflora hybrids are susceptible to harm from severe climate circumstances like robust winds and tough rain. Summer temperatures can direct to root-rot, and plant death can be caused by frost. Petunia grandiflora hybrids might be at risk of fusarium wilt, crown rots, alternaria b Light, botrytis and fasciation. In case a virus is contracted by your petunia grandiflora, flowers and the foliage can happen deformed or stunted. Cleanup and remove components of the plant dropped flowers and foliage from your soil. Good sanitation methods and ensuring your s Oil isn’t also moist can stop or reduce dis Ease by plant wellness that is encouraging.

See related

Pine Trees for Dummies

Pine Trees for Dummies

Pine trees are evergreens that may be planted alone or in groupings that are compact. You can find difficult or yellow pine team, Pinus an estimated 115 species of pine, split in to three classifications; Ducampopinus, the foxtail or pinyon team; the delicate or white pine team, and Strobus. Pines could live for one thousand years or maybe more and can increase greater or 80 feet tall. Methuselah, a Great Basin bristlecone pine (Pinus longaeva) identified in the White Mountains of California, is around 4,600 years old. Plant Northern California indigenous species, including Monterey, coulter, bishop and knobcone pine.

Growing Problems

Pinus attenuata, pine, is usually present in soil which is low in nutrients and areas with full sun. Unless the tree is burned in fire, its cones don’t open to release seeds. Pinus muricata, Bishop pine, is located along the California coastline and tends to grow in acidic. It’s found on north-facing slopes where it’s exposed to conditions that were foggy. Pinus coulteri, Coulter pine, is common along the California coastline, typically identified on south-facing ridges. They prefer soils that are dry but are adaptable to rocky loamy, fertile and infertile soil. Monterey pine is considered unusual among California indigenous plant species, mainly because seeds are only released by its cones at large temperatures. This species thrives in deep, well-drained soil with medium to medium fertility and coarseness but is pretty adaptable.

Pruning

Pruning encourages new branch development assists the trees grow straighter and enables elevated contact with sunlight and air-circulation. Pines throughout the winter-dormant period and through the year as illness and injury does occur. Pruning saws and lopping shears will be the most efficient resources for tree branches that are woody. Make one cut half-way through the lower of a branch, make a cut that is 2nd half-way through the best, around 6″ out from the first-cut, then make a cut just. Branches which can be dead or broken stops the spread of illness to other regions of the tree. Leaving straightest or the most healthy of two branches that are rubbing. Leave two thirds of peak and the tree branches when pruning — failure to do s O outcomes in gradual tree development. New growth appears in the suggestion of branches; a more bushy tree is encouraged by pinching off the candles.

Diseases

Root and butt rot is a typical disease that impacts all species of pine and could swiftly or gradually eliminate trees. Symptoms contain fungus fruiting bodies and needles on the tree close to the s Oil level. Needle forged is an illness at which previous year’s needles flip brown. Most contaminated needles leave development, which might reduce the development in trees but have minimum impact on trees and drop in the year. As the dis-ease is spread by the Monterey pinecone beetle along with beetles pine pitch canker, a disease in the Southeastern United States, tremendously impacts pines Monterey pine. Pruning, planting indigenous species, and drainage and correct soil kinds can considerably lessen pine tree dis-ease. So the dis Ease is not spread to other elements of the tree it is also crucial to disinfect pruning resources after dis-eased branches.

Uses

Pine trees so are valuable for his or her timber and woodpulp and have several various uses. Pine wood is broadly employed in carpentry to produce chairs, lumber, paneling and ornamental trim. Pine wood pulp is employed in creating paper, for generating turpentine, and also the resin of some species is useful. Pine offer efficient shading, while some species harvested and of pine including Scotch pine are developed as christmas-trees. Pine cones are employed in decorations, crafts as well as as birdfeeders. Boughs and the branches of trees are used to generate trays, baskets and wreaths. Pine wood continues to be also employed as a resource for kindling and firewood. Some species including Pinus pinea and Pinus sibirica, produce seeds that are huge called a staple extensively utilized in arts, nuts.

See related

Photinia Leaf Spot

Photinia Leaf Spot

Members of the genus Photinia frequently called red suggestions, are shrubs or small trees appreciated for their appealing, colourful foliage. Some species or cultivars provide a reasonable degree of hardiness although most photinias prosper in hotter areas of the United States. A quantity of diseases and pests might sometimes plague leaf spot, or photinia, for example, fungus Entomosporium maculatum, which is accountable for photinia leaf place. Only slight damage is caused by a a small leaf spot infection but offers the chance to get a serious infestation, that causes causes leaf fall that is harmful.

Symptoms

Photinia leaf spot appears as small, bright-red circles on the upper and lower surfaces of leaves that are young. Spots may coalesce and form huge maroon patches. Spots on leaves have a red border that is deep as well as grey or brown facilities. Spore- bodies resembling small black specks can happen in place facilities. A serious leaf spot infection significantly impacts the general wellness of the plant and causes large, premature leaf fall.

Disease Essentials

The Entomosporium fungus overwinters in infected shoots and leaves, where masses of spores are produced and launched from in winter through spring. Spores spread mainly through splashing new and water leaf spots appear 10 to 2 weeks during moist conditions after infection. Hot, dry climate slows spore dispersal. When circumstances are favorable, infections usually start close to the base of the plant and spread.

Cultural Handle

By preventing the the purchase of crops that display any signs limit the existence of photinia leaf place in the landscape. Spores therefore offer sufficient room between specimens can only travel short distances and enhance air movements around leaves. Avoid wetting the foliage; or water the crops in a time when the foliage WOn’t stay moist for extended when irrigating the plant. Remove leaves that are fallen in the area. Don’t prune crops that are wholesome in the summer or water or fertilize exceptionally, as every one of the practices motivate the creation of new progress that is susceptible.

Chemical Get A Grip On

Commercially -obtainable fungicides provide Entomosporium leaf place get a grip on. The fungus is extremely difficult to to manage on a seriously- plant that is contaminated, therefore where the dis-ease h-AS verified problematic in seasons preceding preventative programs are some-times warranted. Use a fungicide that includes propiconazole, triforine, triadimefon, myclobutanil or chlorothalonil. MidJune efficient get a grip on, use a fungicide every 1-0 to fortnight starting when new progress seems in spring through midJune and again in late drop if moist circumstances is warranted by it Less apps are required in dry, hot-weather.

See related

The best way to Care for a Stewartia Tree

The best way to Care for a Stewartia Tree

Flaky frilly and bark blossoms with yellow stamens that are radiant determine the stylish look of stewartia trees. With respect to the selection, stewartia trees reach heights of approximately 25 to 40-feet within their ideal development locations, U.S. Department of Agriculture zones 5 through 8. Stewartias appreciate a climate that is cool, but take care to keep your stewartia out and watered of the sunlight that is harsh. Cultivars of the genus are closely related, differing mainly high, therefore treatment methods stay constant across sorts.

When planting position your stewartia tree. Make sure that the tree is not the the goal of headon afternoon sunlight as a typically cool-climate is preferred by the genus. Plant the stewartia well- drained soil full of organic matter. The soil should possess a pH range of approximately 4.5 to 6.5. Dig a hole about 2″ shallower than the root ball and about twice as wide. Leave enough room between trees to to allow for the width of the canopy that is mature, an average of about 25 to 30-feet.

“Water-in” your freshly planted stewartia by saturating the floor to fill the empty spaces in the soil. It is best to plant in the summer or spring season. Bolster the development of youthful stewartias using a high-phosphorus fertilizer. Subsequent to the initial fertilizer program – performed according to the directions on the label – you require only fertilize the tree using a common-use fertilizer once every couple of years just prior to the tree enters its development cycle in spring.

Add bark mulch to the root of the tree. Spread a layer about 2 to 3″ thick yourself, since the the expanding medium.

Keep the soil but not over- water or saturated logged. This kind of tree doesn’t tolerate over- drought or watering. By digging your finger to the soil close to the trunk of the tree, check the soil for moisture. The stewartia has adequate water if it’s moist to about 3″ deep.

Prune limbs that are broken. The stewartia tree doesn’t need pruning.

See related

The best way to Pick Dried Lavender Buds

The best way to Pick Dried Lavender Buds

Delicate and fragrant, spikes of pale lavender buds offer year round colour to dried flower arrangements. The best time to harvest lavender out of your bushes is following the flower-spikes kind but before the buds open into complete flowering. Watch for flowers in early summer, following the spring rains are past but before the greatest days of the time. The buds are not dry on the plant, therefore they must be preserved by you for pot-pourri or flower shows.

Following the dew has dried but before the warmth of the day, the lavender flower-spikes in the morning. Select these with free but unopened flower buds for slicing.

Snip through the flower spike stem deep within the bush as feasible, utilizing a tiny pair of shears that are clear. Hold the spikes from the extended stems therefore you do not harm the flower buds as you acquire.

Wrap a rubber band stems. Loop string through the rubber-band to produce a hanging loop.

Hang the lavender stems upside-down in a dark-room, with excellent ventilation. Dry the buds for 2-3 months or till they feel papery and brittle.

To select the dried lavender buds support the down the stem flower side . Wrap your hand round the stem and attract it downward to dislodge the buds. Pick any buds remaining on the stalks yourself off and place them in the bowl together with the relaxation of the buds that are eliminated.

See related

The best way to Germinate Gaillardia Pulchella Seeds

The best way to Germinate Gaillardia Pulchella Seeds

Gaillardia pulchella, generally called blanket, is a cheery, colorful . It creates a sea of colour similar to an Indian blanket when planted in drifts and meadows. It grows well in borders where it seems best in teams of seven or five, or interspersed with spring- flowers for time- blooms. Blanket is best started indoors, four to six months for borders and beds, or sown outside for meadows and big drifts. Seeds planted outside in spring might not germinate until the following spring in warm climates as the seeds germinate at temperatures around 70 degrees Fahrenheit. In climates that are warm temperatures might climb too large before the seeds germinate.

Sowing In-Doors

Fill pots that are little to within 1/2 inch of the top with set them on

Add sufficient water to moisten the soil. Discard any water that drains to the tray.

Place three or two seeds together with the soil close to the middle of every pot. The seeds require light to germinate, therefore don’t protect them with soil.

Slide the tray of pots and fasten the bag closed.

Place the bag of pots in an area with temperatures near 70 degrees Fahrenheit. The pots require coverage to mild, but avoid sunlight.

Remove the pots in the bag when the seedlings arise. Germination requires seven to 20 times. Place the seedlings in a sunny, ideally south-facing window.

When all risk of of frost has passed transplant outside.

Meadows and Drifts

Select an area in full sunlight. Blanket tolerates any kind of soil provided that it’s well-drained.

Prepare the site by digging or tilling to loosen the top few inches of soil. Smooth the the top of soil using a garden rake.

Spread the seeds evenly on the the top of soil. Use approximately 1 ounce of seeds for 10 lbs per acre or every 270 square feet.

See related

The best way to Grow Crassula Portulacaria

The best way to Grow Crassula Portulacaria

From a distance, crassula portulacaria has leaves that look like these on shrubs and standard Us variegated trees. Closer inspection reveals the leaves are fleshy and thick, like their family members that are succulent. Elephants frequently make the same error and feast upon the portulacatia, that’s the reason why it is nicknamed the “elephant bush.” Succulent enthusiasts appreciate portulacaria that is developing as it is a low-maintenance plant that usually thrives on neglect. A well-established plant will bloom.

Plant your portulacaria in a little pot that leaves the edge of the container as well as no over 1 one to two inches involving the root ball. Larger pots holds too much moisture near to the roots.

Use gritty, fast-draining soil, including blend or succulent. Include sand, pumice or alternative grit to the medium to assure the soil does not hold moisture in the event that you make your own blend. Dry circumstances are preferred by Portulacaria.

Choose a vibrant, sunny area with powerful but indirect light, like a south-facing window. Place the plant in the window-sill to keep its green colour instead of alongside the window. Leaves can turn red or yellow in the ideas — a colour change several folks choose. The leaves can be burnt by too much light. Before you get the correct spot experiment with all the location.

Water sparingly — as small as once each month. Saturate the soil with water, then wait several minutes for the soil. Empty the container once all the water has drained to the drip container. Water when the soil has totally dried up. Over-watering is the most easy way to eliminate a portulacaria. Don’t mist the leaves and stems.

Fertilize in planting season with fluid house-plant combine once-per yr, just prior to the hefty developing period commences.

Move into a larger pot the roots commence to grow from the pot holes as well as when the plant grows every one of the strategy to the edges of its own current home.

See related

The best way to Prune Zinnias

The best way to Prune Zinnias

Zinnias are summer- and fall- blooming flowers extended stems that offer both curb appeal and lovely bouquets and prized because of their brilliant colours. They’re indigenous to Mexico, attract birds and butterflies to the backyard, come in various shades and sizes and withstand with occasional watering. Zinnias transplanted and may be started from seed indoors, or direct-seeded in to well-drained soil. Provided that the soil temperature is 70 degrees Fahrenheit blooms will mature in six to seven months.

Prune zinnia blooms often to inspire development that is thicker and stems. Allow the plant to develop several inches. Back the stems utilizing pruning shears that are floral. Plants obtained fullsize from a nursery needs to be trimmed back to about one third of their peak.

Cut dead-head the blooms through the entire season or mature flowers for bouquets. Use pruning shears that are floral or snip the the top together with your fingers off. This can keep the plant producing blossoms in a constant price.

Layer the heights of zinnia hedges the crops that are again more often compared to plants that are front. This can add a stylish terrace look to the floral show that is multi-colored. This result may be improved by utilizing quick-stem zinnia types for extended and the front -stem types for the again.

See related

The best way to Dig Gladiolus Up

The best way to Dig Gladiolus Up

Mainstays of the garden, gladiolus flowers in midsummer, supplying flowers and perpendicular construction to the garden in an extensive variety of colours. Gardeners in many areas of the Bay Region can make gladiolus bulbs in the bottom year round, even though these in U.S. Department of Agriculture plant-hardiness zones 7 and 8 should use a layer of mulch in autumn to shield them from temperature changes and freezes. The single time Bay Area gardeners should dig the bulbs is when they intend to transfer them to a place that is new.

Dig gladiolus bulbs in the autumn allowing sufficient time to ripen fully. Beginning in the periphery of a clump of bulbs, generate a garden fork or spade 7 to 8″ to the soil and pry up. Take care to not injure the bulbs as you dig.

Support the crops by the leaves and stems and shake them to get rid of the soil that is free.

Cut off the one to two inches over the bulbs using a knife.

Place the bulbs on a level surface to dry for 2 to three months. Dry them in a well-ventilated place and don’t cover them. Temperatures between 85 and 80 degrees Fahrenheit are ideal although not important.

Brush off any free soil together with your hands following the bulbs are dry. Do not rinse them. Lose delicate or any discolored bulbs.

Break off last-year’s bulb, which will be the shriveled and flattened construction beneath the bulb, together with the little cormels around the foot of the bulb. Dry the bulbs for yet another two to three times allowing the scars to seal.

Scatter the bulbs with bulb dirt and put them in fabric, paper or net bags for storage. Leave the tops of paper bags if possible,, and open hang the bags to ensure that air can circulate around them. Store in a place that is dry with temperatures below 40 degrees Fahrenheit but above freezing. Before you’re primed to put them in spring, leave the bulbs in storage.

See related

Dendrobium Orchid Propagation Techniques

Dendrobium Orchid Propagation Techniques

Dendrobium (Orchidaceae) is a genus with over 1 1,200 species and hybrid varieties called “grexes.” Thriving in forests of south-east Asia and other zones, dendrobium is epiphytic, meaning it clings to the bark of trees for help or rocks instead of growing in the floor. Orchid tradition is without soil as orchids absorb moisture and nutrients in the environment. Grow dendrobium orchid outside in U.S. Department of Agriculture plant-hardiness zones 10 and 11 or within as a potted plant. As an epiphyte, dendrobium needs a humid environment in light. Although seeds can propagate dendrobium, house growers most frequently practice asexual propagation methods.

Keikis

Under low light problems, dendrobium plants create new crops called “keikis.” As off-shoots from a node on mom stem keikis increase. Roots while still connected to the mother-plant are produced by these off-shoots. Propagate dendrobiums by keikis by severing the stem one to two inches below the node and over the node following the keiki develops three to four roots. Plant keikis in a porous medium, including composted fir bark. Keep new crops from direct sunlight. Set pots on a tray of water with marbles or pebbles to keep the pot from the water.

Pseudobulbs

Propagation by division of the rhizome requires severing the rhizome between sympodials, which are stemandleaf growths in the root of the plant. With sympodials pseudobulbs produce on several species, offering water and nutrient storage. Use a knife or razor-blade. Sever the pseudobulb from the aged pseudobulb in the axis, producing the cut near the pseudobulb that is aged. Slice the the rhizome in to parts with at least one stay eye, even though three to four reside eyes on each and every section is most useful when there’s pseudobulb. Place pseudobulbs or severed rhizomes with excellent ventilation on sphagnum peat in a low light atmosphere. A day, mist and keep sphagnum moist but not soggy. When new development develops, transfer the new crops to pot and their natural surroundings.

Old Pseudobulbs

Grow plants from old pseudobulbs that seem to be lifeless. The eyes are still viable in the event the pseudobulb is dormant. Pull off leaves and the covering. Place the pseudobulbs in spaghnum peat that is moist together with the eyes. Store them in a warm region. Deliver these in the environment where you develop your flowering orchids when growth begins. This method can take.

Culture

Use fir bark or alternative potting combine designed for propagation when potting youthful crops. Keep crops in nicely-ventilated areas. When the the top of potting combination is dry, water approximately a week. Move plants into vibrant, in direct mild or provide up to 1-4 hrs of synthetic light per day.