How To Pick A Front Door

How To Pick A Front Door

Entry doors are supposed to be strong, durable, and long-lasting. They are the first line of defense from intruders. They also bear the brunt of tough weather conditions including heavy rain, snow, wind, and the scorching sun. That’s why you cannot afford to have a weak door.

In case you are planning to replace your handyman services, there are a few factors that you must consider:

Picking the Right Material

The strength of the house repairs depends on the materials they are made off. At the moment, there’s a huge diversity available. From simple wooden doors, steel doors, fiberglass front doors, to aluminum doors, the options are simply endless. So what are some of the benefits that you are likely to get from these various types of front doors?

Well, here is a simple break down:
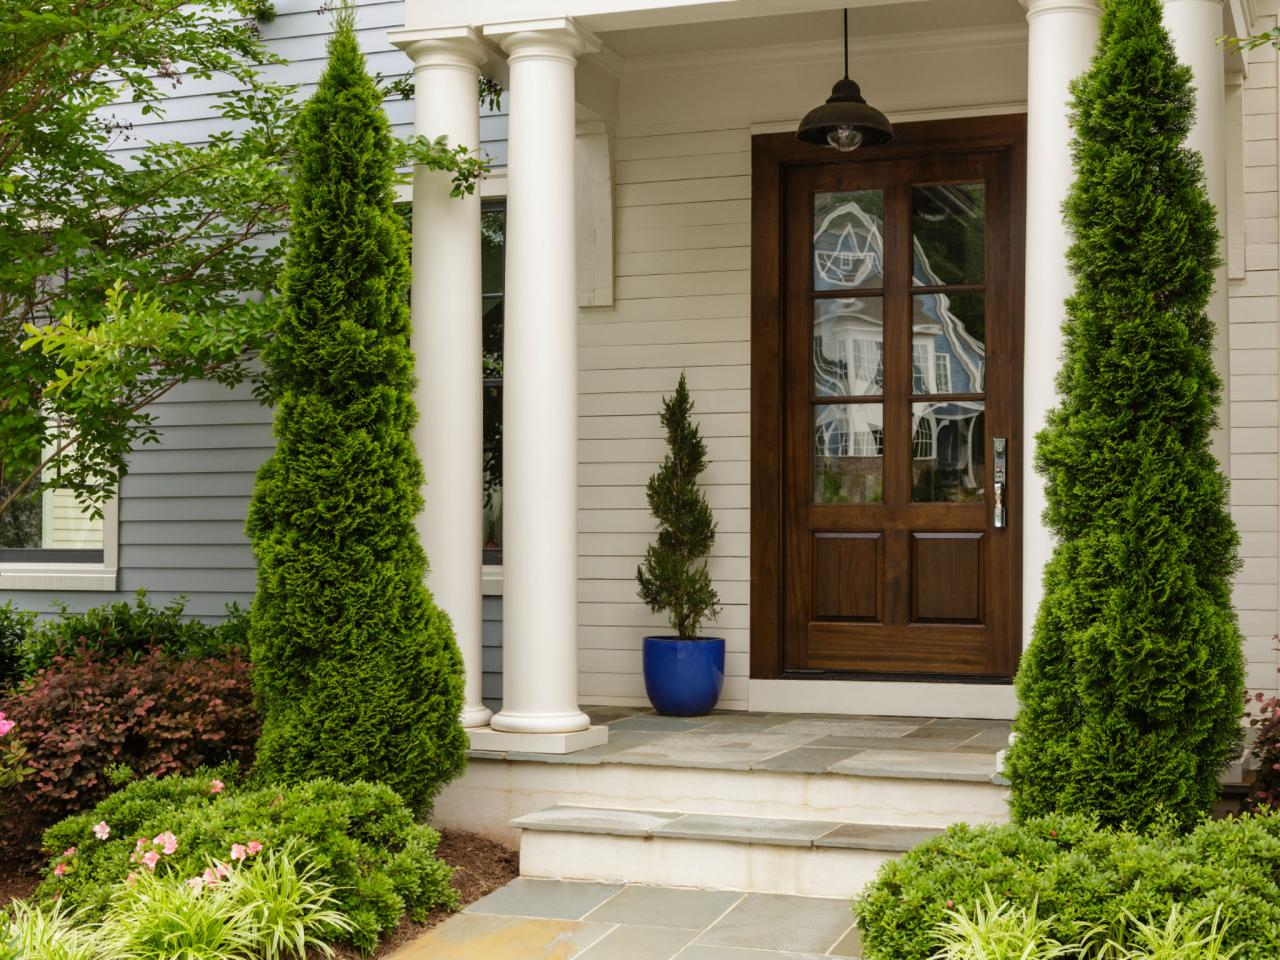
Wooden Front Doors

Wooden house repairs are simply vintage. Custom made wooden doors are beautiful and quite versatile. Modern designs made out of mahogany, oak, cherry, and walnut can withstand the torments of nature very well too. However, wooden doors are quite expensive. As you shop for the doors, look out for durable stains and clear finishes. The type of detailing and the thickness of the stiles and rails are also other important factors to consider.

Steel Doors

If your priority when it comes to handyman contractors is simply strength and security, then you can never go wrong with steel doors. The cost of steel doors is also not that high, especially if compared to wood. The doors will also last long. The only challenge is that the steel doors will require regular maintenance including repainting once in a while.

Fiberglass Composite Doors

The biggest advantage you will get with fiberglass-composite doors is strength and minimal maintenance. The doors are also relatively beautiful and stylish compared to steel. They can easily be customized too. Fiberglass doors are also relatively affordable and will last for a long time. If you live in areas with harsh climates, this would be the ideal handyman to have.

Aluminum Doors

Aluminum doors are usually custom made for various homeowners before they are sold. They are relatively stronger compared to wood and fiberglass. Unlike steel that needs regular repainting, aluminum requires very little maintenance. Besides, the door won’t rust so there’s a chance it may last quite a number of years. The biggest challenge with aluminum doors is that they are very expensive.

Making the Smart Choice

The most important thing for you as a homeowner is to pick a handyman that offers the best security, a cheaper price, and added energy savings. Each version of doors available in the market has its own unique benefits. However, it all depends on what you are looking for. If looks and class are what you want, wooden doors will come handy. If you are looking for strength and longevity, steel and aluminum will be the best choice. Fiberglass will offer strength and longevity too but may lack the aesthetics of wood.

Trellis Plants for Zone 9

Trellis Plants for Zone 9

A long growing period as well as high summer temperatures characterize the Environment of Sunset Zone 9. This zone has a a belt extending from Redding to Mettler in the north, south of Bakersfield and surrounding the lower — and colder valley of California. Crops that are trellis are imaginative and colourful additions to any Zone 9 backyard. They’re big enough to to create a a garden privacy wall or tiny enough to easily fit into a planter on a porch. Crops that are trellis help create a brand new salad as well as can produce a cascade of flowers.

Jasmine’s Attractiveness Hides Refined Fragrance

You you will not be dissatisfied by the creamy-white flowers, mild fragrance or the hummingbirds interested in a Chilean jasmine (Mandevilla laxa). These twining vines grow properly and look spectacular when grown over tall, freestanding trellises in containers that are big. Their desire for extended times and capacity to withstand temperatures near 1 2 degrees Fahrenheit make Chilean Jasmine an applicant for just about any Zone 9 backyard. Plant in sun in well-drained soil and water mildly. They bloom continually from late spring through early summer. Cut the vines that are tangled to near-ground level in late-winter each yr, and they’re going to resprout.

A Yearly Favored

Sweet peas (Lathryus odoratus) are one of the most colourful and well-known trellis flowers. These sun-loving vines come in various colorful sub-species including red, purple, yellow, white, pink and blue. When planted in full sunlight just after after the last frost they develop in the long growing period of Zone 9. When planted in well-drained soil, they can be easily trained into a container trellis or employed to produce a flower wall on patio trellis or a big backyard. To get a fragrance to coincide with the colours, buy heirloom types like the maroon coloured violet Cupani, the red and Black Knight or the pink Prima-Donna.

Consider the Strange

Cucumbers on a trellis displays off your creativeness and flair. Select a slender range including Tasty or Sweet Achievement Jade and develop the crops in full-sun on A5-by-4foot lattice trellis. As the vines close to the leading, pinch the suggestion to pressure branches to cover the trellis and encourage fruit development. Trellis-developed cucumbers expel the back-ache of weeding and pest get a handle on and make harvesting very simple. The high summer temperatures, lots of water along with a weekly fluid fertilizer feeding of zone 9 will offer plenty of cucumbers for a summer salad.

An Organic Butter-Fly Attractant

For those who have patience along with a huge, strong trellis, consider California Dutchman’s Pipe (Aristolochia californica). This California native is indigenous to Sierra Nevada foothills and the coastline ranges and is effortlessly adapted to Zone 9 circumstances that are developing. This woody vine’s light-green flowers are patterned with maroon or brown stripes and resemble ducks or smoking pipes with a bent stem. Use a trellis that is durable as the plant matures for just two to three years and show patience. Pipevine swallow-tail butter flies, Battus philenor, for which it’s the host plant will be soon attracted by it. Plant in partial shade, to keep this grower educated and wholesome to the trellis and slender in spring water reasonably.

See related

The best way to Wash #3 9 & a Rubber Plant;s Leaves With Water & Lemon Juice

The best way to Wash #3 9 & a Rubber Plant;s Leaves With Water & Lemon Juice

A tree made well-known by easy care and its foliage, the rubber plant frequently serves as an ornamental house plant. Also called the rubber fig, ficus elastica as well as the rubber bush, this member of the Moraceae family is is known as because of its production of latex sap, that was originally employed to make rubber. Today kinds of latex-generating trees offer materials for the rubber market, as well as the rubber plant is rather valued for aesthetic reasons, including its large, shiny leaves. To keep your rubber plant seeking its finest, keep the leaves free of mildew and dirt buildup.

Fill a spray bottle and spritz a clear bit of cloth, including spare cleansing rag or a gentle wash cloth created from old garments. Get the fabric moist but not wet.

Place your hand underneath a leaf in your rubber plant and wipe the topside down toward your body, with all the fabric, to eliminate the dirt. Do therefore on all the leaves.

Open the spray bottle up and add 1 teaspoon of lemon-juice. Close the bottle and shake it until well-mixed.

Spray it with the lemon-juice mixture and choose a fresh cloth, again obtaining the fabric only somewhat moist.

Wipe down all the leaves using the new fabric to eliminate places and mildew residue from hard-water deposits.

See related

Tips For How To Build Your Dream Home

Tips For How To Build Your Dream Home

Building their dream home is something that a lot of people work towards. Some save all their life to achieve this, others take a mortgage. Given that most people will spend a big part of their life in one home, it would be wise to do all you can to build a beautiful one.

There are a few tips that can help you come up with the best design for your house, which are used by experts in the industry. It all starts with choosing the ideal neighborhood for your home. After that, you should discuss the layout and design with an expert.

Look at the current house you are living in. There are some things that you like about it and some that you don’t. From this perspective, you can then have a rough idea on what you would want in your handyman in Gilbert AZ. Discuss these ideas with your contractors. They will advise you on the best way to achieve what you want in your custom home.

Location

This is the first thing that you have to consider. Select a location that will be good for your family, even years down the line. Look at a location that will make your commute to work easier. Consider amenities and social facilities available for your kids, the schools in the neighborhood etc. If you do not get these right, you might build a lovely home but never get to enjoy living in that community. You might also end up having to sell.

In terms of location, you will also want to look at the physical features around. Look at the views, the vegetation and so forth. When you select a good site, you will be in a good position to appreciate handyman Gilbert AZ even more.

You would also want to spend some time talking to the builders in the neighborhood. Learn from them about the style of house you want, and whether it would be a good choice. They can recommend a few modifications to your plan, considering things like the direction of the sun, the type of soil etc. You can even have a look at some of the properties located in this neighborhood.

Work with Experts

With the location locked in, you need to get the right contractors to build the handyman Gilbert. You will need engineers, architects, and builders. Get in touch with a company that has all these under one roof. This way it will be even easier for you.

You should also discuss the costs. Building the basic structure of a house is usually an easy task. However, it’s the finishes that make the house a home. There are a lot of simple things that you will have to look at where the input of an expert will come in handy.

Discuss any relevant costs that will be incurred in the process and make sure that you are on the same page. With professional custom home builders, you will have a good chance of success. Talk to them about what you need and how you want it achieved. Share ideas with them. Once you agree on a project, relax and let them build you a beautiful custom home.

The best way to Create a Yard Deck

The best way to Create a Yard Deck

Creating a lawn deck is a a great way to strategy to add value to your own home. As it’s not attached to your own home this kind of deck is occasionally called a floating or free-standing deck. Decks offer extra room cookout together with your family to entertain friends or merely a peaceful place to have a cup of coffee while reading. This can be the best task for do-it- . With preparing and good planning, you be prepared to entertain the next and can construct your deck one weekend.

Planning

Study your yard to find out the best place for the deck. Choose an area which is level and one that doesn’t flood or have standing water.

Indicate the area for the four corners utilizing landscaping spraypaint. Take measurements of the region that is chosen, transfer the measurements into a little bit of paper and make a sketch of the deck. This can help you decide the quantity of materials needed for the task.

Call your city-building department and inquire in the event that you require an allow or whether there are any particular needs. Verify to determine whether there are any constraints or materials specifications for those who have a homeowner’s association.

Set the Footings

Place pre cast cement footings 6″, a-T every corner in in the spots that were sprayed. This permits to get a minor over-hang of the body of the deck. Like, for a10-by-1 2-foot deck, room the footings for the sides 11-feet aside and 9-feet apart for the lengthy aspect. The footings will set the deck 6 inches over the bottom. In the event that you would like the deck nearer to to the floor, seek out out the preferred quantity of grime and sod from under each footing.

Check to find out the footings are in the correct place. Measure the the length involving the footings. The measurement for the extended sides should be equivalent at the same time as the measurement for the sides that are quick. Measure the the length diagonally from your corners that are opposite. These measurements should be equivalent. Make any changes that are essential.

Level the corner footings. Place a-2-by-6inch board in to the grooves of the corner footings and relaxation a carpenter’s le Vel on the board. Make any changes that are required to make sure the footings are level.

Set extra footings between as well as in alignment with all the corner footings on the extended sides. Evenly area the footings 16 to 24-inches besides corner to corner. Level every one of the footings using the corner footings. Set extra footings involving the corner footings on the brief sides in a style that is related.

Set the the inner footings in rows between footings on the extended sides. Double check always footings before continuing for le Vel.

Assemble the Body

Construct the body on the bottom off to along side it of the footings. Because of this example, use two 1 2-foot and two 1-footboards. Sandwich the boards involving the ends of the boards that are lengthier. Make certain the sides of the 1-0-foot-boards are flush using the ends of the 1 2-footboards and then attach them together a T the corners.

Lift the body, using the aid of an assistant, and place it. Adjust it therefore that there’s an equivalent a mount of over-hang in the corners.

Place 1-foot deck joists or help boards in the grooves of the the inner footings involving the 1 2-foot sideboards. Attach each assistance board to the sides of the 1 2-footboards with decking screws.

Install the Leading Boards

Lay the 1 2-foot best board on the other side of the assistance boards. Start a-T one aspect such that it’s flush with all ends and the outdoors of the body and placement the board. Attach it with decking screws to each help board.

If the lumber is moist Butt the board-up against the medial side of the first. As the wood dries, it is going to shrink and a little gap involving the boards will will build up. It’s important to have a a niche to permit water to drain off the deck.

Maintain A1/8- to 1/4inch gap between lumber that is dry. This is done using a nail that was spare. The nail functions just like a spacer. Hold it with decking screws, and after that attach the most notable board to the assistance boards. As you make the right path toward the contrary side of the deck continue the method.

See related

The best way to Get Cleared of an Aged Dehumidifier

The best way to Get Cleared of an Aged Dehumidifier

Get rid of your de-humidifier the accountable way instead of merely putting it on trash day next to your trashcan. Dehumidifiers are a kind of equipment that eliminate excess humidity in the air, hence lowering mildew and mould buildup in the house. Look for methods it could be re-used or recycled in the event the equipment is in excellent operating situation.

Selling

Sell your de-humidifier in flea-market or a garage sale. Do therefore along with other appliances that are outdated or sell them on it’s own. Browse the classified section of your newspaper to find out if an advertisement has been put by anybody about purchasing appliances, about promoting the de-humidifier, or place an advertisement yourself. Another alternative would be to sell the appliance into a pawn shop.

Donating

Donate the de-humidifier into a charitable organization in your area. Look for Goodwill or Salvation Army stores, or check out nearby second hand shops that donate all their profits or most . Do some investigation to seek out an organization that supports causes you’re interested in, like a thrift-store that donates its proceeds to AIDS study, in the event that you reside in a area with several choices of the kind. Ask to get a receipt if wished to to use the donation as a tax writeoff.

Give A-Way

In the event you’re not having much luck marketing or donating your outdated de-humidifier, speak to family and buddies to discover some one interested in taking the the applying. Supply the dehumidifier to one who is suffering from humidity or a friend with mould allergies – connected headaches. Family and friends who’ve issues with pest insects can gain from a de-humidifier, as cock Roaches, ants, termites, centipedes, silverfish along with other bugs are interested in use and humidity dampness-abundant surroundings to create websites that were breeding.

Throw A-Way

In the event you if you choose to to toss your outdated de-humidifier a-way, c-all the public-works division of your nearby municipality to learn how to the best way to responsibly dump the the applying. Just like air conditioners, several de-humidifiers use HCFCs, or refrigerants containing hydrochlorofluorocarbons. HCFCs add to the destruction of the world o-zone layer when launched to the atmosphere as a result of improper equipment disposal. They affect climate-change, and are also greenhouse gases. Prior to the appliance may be securely trashed the refrigerant has to be removed with a professional. Depending on the procedures of your town, t-AKE the de-humidifier to your dump website or transfer station, or you might have to to set up a pickup time for the the applying to get a little fee. Ahead of the dehumidifier could be discarded you could also must have your local sanitation division eliminate the dangerous contents to get a fee.

Bounty Progaram/Re-Cycling

Ask your utility company whether it gives a rebate or bounty plan that can pay your equipment to be disposed of by you, and inquire how their plan operates. Like, a bounty system will typically request the appliance works, plus it could only protect appliances with dimensions that are particular. Recycling your de-humidifier isn’t unlike losing it in you will need to have all harmful chemicals removed ahead of the item could be securely re-cycled, which generally requires the assist of your local sanitation division responsibly. The steel elements of the de-humidifier are eliminated for re-cycling and the remaining appliance broadly speaking is sent to some landfill. Talk to your own local public-works office or hazardous-waste facility for recycling your de-humidifier to find out the most useful course.

See related

Wood Heaters: the Best Way To Get the Heat

Wood Heaters: the Best Way To Get the Heat

Useful wood heaters can be essential components for warming, although wood stoves are usually the attractive centerpieces of family gathering room in the house. Optimizing the performance of your wood heater helps to ensure that you are maintaining your heating expenses without sacrificing comfort through the fall and winter months, as little as possible. Getting the warmth out of your wood stove is a mixture of appropriate burning techniques and using style and contemporary wood stove engineering.

Choose only seasoned wood. Freshly cut or “green” wood includes a large proportion of water-weight, which means bad burning and cooler temperatures in your wood stove. Wood which were left to dry for at least 12 months looses a substantial part of burns and its own water more effectively and at higher temperatures.

Opt with high-energy output for wood. The warmth performance of wood species is measured in btu’s, which decide the quantity of heat per cord. Hardwoods, including oak, green ash, white ash, maple and apple, have a few of the best heat power out-put.

Keep water. Rather than a single huge pile of fire-wood, choose for several stacks that are tiny to ensure circulating air can keep the wood dry. Orient your wood piles to ensure sunlight is received by them. Though tarps will keep your wood wind ravages them, and tarps aren’t successful. An easy wood shed with the angled roof that carries rainwater away out of your wood is the greatest defense against dampness that is environmental.

Evaluate the insulation of your home. Drafts around doorways and windows reveal inadequate insulation. The better-insulated your residence is, the less warmth you will free if you are burning wood. It is possible to take tiny measures in reducing warmth reduction though insulating your house is probably a work to get a professional. Like, in case your windows sense seal them or add free insulation to your own attic to stop losing of heat that is rising. Use “snakes” or rolled towels in the front of drafty doorways.

Check the age of your stove. In properties, stoves will tend to be be out of code with existing EPA specifications for performance and emissions. In case your stove installed and was created prior to 1994, it’s likely perhaps not working as effectively as stoves that are newer. Consider up-grading to your post- combuster which permits your stove to burn off the smoke in the exhaust and change it to warmth power or 1994 design to ensure a-T least 76% effectiveness, especially amodel featuring a converter.

Build the best type of fire on your needs. Packed drywood will burn up swiftly a-T high temperature, best for swiftly heating a room that is little. Pack logs close-together in the trunk of the firebox using the coals close to the front to get a slower, mo-Re steady burn up in case you are hoping to sustain a warm-temperature all through a greater area on the span of many hours.

Keep the damper tightly-closed whenever you’re not using the hearth to stop your your heated air .

Make sure your fire-place is outfitted with glass or steel doorways that near the complete entrance of the fire-box on, as-is needed by California regulation.

Opt to get a heater having a lover attachment that circulates it all through the space and pulls heat in the stove.

See related

The best way to Get Rid of Aphids & White Flies on Basil

The best way to Get Rid of Aphids & White Flies on Basil

Basil (Ocimum basilicum) is a standard herb in Italian, Thai and other kinds of cooking. Even though it does sometimes suffer from issues, it grows fairly effortlessly during summer in Sunset’s Environment Zones 1 through 4-5. Aphids and whiteflies equally prey on crops that are basil. These insects damage the plant leaves, decreasing the quantity of basil accessible for the gardener to harvest. Luckily, it’s possible to lessen their populations or to bodily eliminate these bugs.

Look for white flies and aphids on leaves, making certain to test the underside of the leaves. Aphids are generally wingless, green and tiny. Whiteflies are small, yellow-ish bugs with wings that are white. Some signs of aphid injury contain yellowing leaves, curled leaves, leaves that were stunted. Symptoms of white flies contain leaves and leaves that dry out and fall-off. Black sooty mould to to look on leaves can be also caused by both bugs. Catch and monitor crops aphid infestations before the leaves begin to curl and offer hiding areas for the aphids.

Remove seriously infested leaves to aid reduce populations on the crops.

Spray the aphids and white flies using a hose to to clean them away. Consider vacuuming white flies off of leaves using a little battery-operated vacuum.

Introduce insects to the backyard. Parasitic wasps, ladybugs flies reduce populations. Lacewings, large-eyed bugs, minute pirate bugs, Scymnus species, Chilocorus species as well as the Asian lady beetle reduce populations.

Continue analyzing the basil crops regularly, and wash-off any aphids or whiteflies.

See related

The best way to Change a Fuel Grill Tank

The best way to Change a Fuel Grill Tank

Gas grills provide a hassle-free method to appreciate barbeque at house. Home fuel grills operate from a 20-pound propane tank also referred to as bottle or a cylinder. It has to be eliminated and replaced using a complete cylinder if you have consumed the propane in the cylinder. Changing a gas grill cylinder is a procedure that is straightforward.

Grills Since 2002

Turn burner valves off. Remove any panels or addresses that block entry to the fuel cylinder. Close the valve on the fuel cylinder.

Undo the connector that ties the grill’s fuel regulator hose to the propane cylinder. Since 2002 use a connector having a plastic ring that fits around the outside the cylinder valve nozzle gas grills produced. Undo the connector yourself, turning it counter-clockwise. In the event the connector doesn’t change effortlessly, change it it with groove joint pliers. Be cautious not to crack the fitting. Pull the regulator from the fuel cylinder.

Loosen the clamp that secures the very top of the propane cylinder. By undoing a wingnut, in many grills, the clamp loosens. The clamp usually will both swing apart to free the cylinder or lift-up. Lift the cylinder that is empty and pull out it in the grill. Inspect the regulator, cylinder and regulator hose for just about any damage.

Exchange your cylinder to get a complete substitute cylinder using a propane trade at any given store, or consider your cylinder to your propane supplier for refilling.

Install the entire cylinder in the grill, sliding it to the area where the cylinder was situated. Orient the valve nozzle of the total cylinder in the same path as the valve nozzle of the cylinder that is empty. Reattach and tighten the clamp securing the cylinder best. Reconnect the grill’s fuel regulator fully cylinder by fitting the black-plastic ring on the valve nozzle and turning the ring clockwise. Tighten hand-tight. Don’t use resources.

Turn on the cylinder valve. Check the regulator link for leaks by brushing a water and soap solution onto it. If no bubbles appear, the the bond is limited. Whether there are bubbles round the regulator link, flip the fuel cylinder valve off. Undo the regulator link and wipe the threads of the cylinder and connector valve using a rag. Reconnect the regulator turnon the gasoline and search for for leaks. Replace any protect panels. Turn on the burner knobs and light the grill.

Pre-2002 Fuel Grills

Before 2002 may possibly use a regulator connector that screws within the cylinder valve nozzle gas grills created before. Turn the cylinder valve off. Undo this connector having a wrench or a joint pliers. This connector utilizes a thread. By turning it clock-wise loosen the connector.

Remove the cylinder from your grill, refill it or trade it for a total cylinder and re install it.

Thread the regulator connector to the valve nozzle till it feels tight and transform it it counter clockwise with wrench or pliers. Turn on the cylinder valve and search for for leaks using the water remedy.

See related

The best way to Grow Cantaloupes Vertically

The best way to Grow Cantaloupes Vertically

Nothing is really as refreshing as biting into a slice of great cantaloupe on a warm summer day. Cantaloupe, also called muskmelon, is an orange- cucurbit using a netted skin that is tan and green. Seeds are generally planted in mounds and need three to four feet of room between mounds to to allow for trailing vines. The crops can take up most of a backyard when with all this this area, but the crops develop vertically and do not require as backyard square-footage, in case you develop cantaloupes on cages. Vertical expanding retains creating fresh fruit off the floor, lowering rot and infestation.

Till the planting location to loosen the soil; a planting room is needed by melons with full-sun. Add amendments like peat moss for drainage or completed compost for nutritional elements, after which till to to add the elements.

Work the soil in to hills around 3-feet in diameter, 10 to 12″ high, and having a flat, spherical best. Melons are usually planted by gardeners in mounds with tops, but the flat-tops of hills are capable to decrease water run off and keep moisture.

Dig a little furrow round the bottom of every hill having a garden hoe to irrigate the melons. Cantaloupes should never be watered right on the foliage, but the water is absorbed up to the plant roots through the hills, in the event that you water the furrows.

Plant four to five seeds aside and 1 inch deep in a circle on every hill. Water the furrows the hills across frequently to keep the soil. You hills with completed compost for nutritional elements. the can also use a full fertilizer, like 101010, to

Thin out seedlings when each plant is a couple of inches high, leaving only the most healthy two plants in every single hill. Thinning reduces competition for nutrients, water and space to enable healthy plant improvement.

Cut 6-foot concrete -1/2-feet, utilizing one-piece for every hill. Clip the bottom row of wire in the wire mesh to generate toes to drive to the soil.

Wrap the wire and secure the ends to produce a cage roughly 3-feet in diameter. Therefore the bottom row of wire rests on the soil in the furrow push the wire toes to the s Oil. The cage should really be big enough to completely encompass the hills, in the event the wire rests in the furrows, but it really is okay.

Drive three 3-foot 2by-2inch wood stakes 6 to 12″ deep in the floor immediately against the wire cage. Secure the cage to the stakes with wire or zipties. Additional balance is provided by the stakes for the cages, which can be important for help the pounds of melons that are building.

Continue watering the furrows seriously to keep the s Oil moist. Melons need plenty of water to create fruit that is juicy.

Push expanding vines as the develop to keep the plant contained within the wire-mesh in the cages. Development might require to be pushed in the cage, although the vines should normally entwine themselves in the cage.

Tie items of scrap cloth, like old T-shirt ny-lon or strips nettting to generate melons that are creating to be supported by slings. The melons certainly will fall off if perhaps not offered help to keep them suspended in the air and get large on the vines. The slings should be enough to allow for ongoing progress, although limited enough to to guide the good fresh fruit.

As they ripen, harvest cantaloupes. Judge for ripeness utilizing odor and dimensions as indicators. In the event you raise and twist the fresh fruit, good fresh fruit that is ripe breaks quickly in the stem, while un-ripe good fresh fruit is mo-Re hard to choose.

See related